Tag Archives: Guides

How to Make Your Own LEDS? Whooooooooa

I found this how-to today on the great Popular Science web site.

Now that I’ve read through the article – I am amazed that I’ve never seen these instructions written up before.

Theodore Gray, who authors their popular “Gray Matter” column, gives the full scoop on the basic materials used to construct LEDS and provides the basic instructions needed to see just how LEDS work.

OK, it is not so easy to find some synthetic silicon carbide (carborundum) laying around, but surely everyone could get their hands on some sandpaper, needles, a 9V battery and a snap. Follow his instructions, and VOILA…you’ve recreated the basic principles behind the creation of LEDS.

LED Basics: How to tell which lead is positive or negative

Here are more questions we get asked a lot:
What is the positive (or negative) lead on an LED? How do you determine the polarity of an LED?

If you are talking about through hole LEDS, in most cases it’s pretty easy to determine the polarity.

Through Hole LED

Through Hole LED

If the LED has two leads, one longer than the other,the longer lead is the postive (also known as the anode) lead.

If the LED has two leads with leads that are equal in length, you can look at the metal plate inside the LED. The smaller plate indicates the positive (anode) lead; the larger plate belongs to the negative (cathode) lead. Unfortunately, some jumbo LEDS have the plates reversed so this is not a fool-proof method.

If the LED has a flat area (on the plastic housing), the lead adjacent to the flat area is the negative (cathode) lead.

It’s a little bit harder to determine the polarity with Surface Mount LEDS. Some are marked with a (-) to indicate the negative lead, but often, they are not. The single best way to determine the polarity is through the use a multimeter.

Surface Mount LED

Surface Mount LED

Set the multimeter to the diode/continuity setting. Usually,the multimeter will supply enough current into the LED which will just barely light it up. The black (common) lead on the multimeter indicates the negative (cathode) lead, and the red indicates the positive or anode side.

Of course, if you can find the datasheet for your LED, the pinout, along with all the other specs will be readily available on the datasheet.

Connector Terms and Glossary

Are you a connector newbie? Below is a collection of terms relating to connectors with their corresponding definitions.

Attenuation – Decrease in power due to resistance or mismatch in transmission line.
Back Mounted – When applied to a coaxial connector it is that connector mounted from the rear of a panel with the fixing nut on the outside.
Bandwidth – Distance between two frequencies over which a RF or microwave device is intended to work.
Between Series Adaptor – An adaptor used to connect two different generic types of connector.
BNC – Bayonet Nut Connector.
Braid – A weave of metal strands used as an electrical shield for an insulated conductor or group of conductors.

Connector

Connector


Bulkhead Mount – The type of connector fitted to a chassis using a single cut-out hole.
Cable Retention – The mechanism that joins the connector to the cable.
Cable Retention Force – The axial force which a connector / cable join can withstand.
Captive – A component such as a contact which is held firmly in position.
Characteristic Impedance – That impedance at which the transmission line is intended to work. A change from the characteristic impedance along its length will cause mismatch and loss of power.
Clamp – The holding of a cable by use of a screw thread action.
Closed Entry Contact – A female contact which is designed to prevent insertion of a contact larger than that specified.
Coaxial Cable – A transmission line where the one conductor is concentric inside another, often abbreviated to “coax”.
Coaxial Termination – A resistive element used to end a coaxial line in its characteristic impedance.
Coaxial Terminator – A device for terminating coaxial cable to a PCB or bulkhead mount (a mechanical device and should not be confused with coaxial termination)
Conhex – Tradename covering SMB and SMC, both in 50 Ohm and 75 Ohm impedance (discontinued)
Connector Durability – The number of times a connector can be physically mated and still maintain its specified performance.
Contact Resistance – The measurement of the DC electrical resistance between a pair of mated contacts. Usually specified as being measured after a given number of mating cycles.
Corona – A discharge of electricity caused by the ionisation of the air around a conductor just prior to total breakdown or flashover.
Crimp – The action of distorting a metal tube to give intimate contact with a conductor; a good crimp should be gas tight and not be impacted by environmental change.
Crimp Dies – The tool inserts which determine the shape of the distortion to create a consistently good crimp.
Crimp Tool – The tool which holds crimp dies to apply the necessary force.
Cross Talk – The amount of signal which may be transferred from one signal carrying line to an adjacent line.
Cut Off Frequency – The frequency at which the loss exceeds a predetermined level.
Decibel (dB) – A unit of measurement of RF power loss.
Dielectric – The insulating medium which holds the center conductor concentric within the connector or cable.
Dielectric Constant – The electrical value of dielectric which determines the impedance in cables or connectors with constant diameters.
Dielectric Withstanding Voltage – The maximum voltage that a dielectric material can withstand without failure.
Direct Solder – A common method of terminating connectors to semi-rigid cable by soldering the cable jacket to the connector.
Discontinuity – A dramatic change in characteristic impedance which gives rise to a reflected wave.
Dissipation – The unused or lost energy in a system e.g. heat.
Distortion – An unwanted change in a signal wave form.
Dummy Load – A device connected to the end of a transmission line to absorb transmitted power and prevent reflected energy.
Dust Cap – A mechanical device attached to the mating face of an unmated connector to prevent ingress of contaminants and provide protection against mechanical damage.
Electromagnetic Compatibility (EMC) – The ability of a device to operate within its intended environment without being effected by or generating electromagnetic interference (EMI).
Engagement and Separation Forces – The forces required to mate and unmate a pair of connectors. The forces are usually specified as a max & min for each action.
Environmentally Sealed – A connector that is provided with seals or other devices to prevent ingress of dust, moisture or other contaminants while mated which might impair performance.
Flexible Cable – A coaxial cable where the outer conductor is flexible (usually braided).
Gigahertz (GHz) – A measure of frequency representing 1 billion Hertz (cycles per second).
Impedance – See ‘Characteristic Impedance’
In-Series Adaptor – An adaptor which enables the connection of two connectors of the same generic type.
Insertion Loss – The loss of power due to a particular component in a transmission line (e.g. cable).
Insulation Resistance – The electrical resistance between two conductors separated by an insulating medium.
Intermodulation – The mixing of two or more frequencies which are not intended to mix.
Interface – The two surfaces of a connector which come into intimate contact when the two halves are mated.
Inter-series Adaptor – See ‘Between Series Adaptor’
Isolation – The measure of interaction between two or more transmission lines.
Jack – One half of a mating pair of connectors. The jack interface normally goes inside the plug interface.
Mean Power – The mean value of the rate at which energy is transmitted from one place to another.
Micro Strip – A transmission line consisting of a flat conductor on a dielectric above a single ground plane. (the ground plane is frequently a metalized face of the dielectric).
UG909B/U Female Bulkhead Clamp Kings Connector

UG909B/U Female Bulkhead Clamp Kings Connector

Microwave – Very short electromagnetic waves. Frequency range above 1 GHz.
MIL-C-39012 – The generic specification covering USA Military coaxial connectors.
MIL-C-17 – The generic MIL spec covering coaxial cables.
Mismatch – The condition in which the impedance of the source and load are not the = same. This reduces power transfer and causes reflections.
Mounting Plan – The design of the PCB or panel cut-out used to mount the connector. N Connector – This was the first true microwave connector capable of working to 18GHz, initially designed for test applications.
Nanohex – Trade name covering SSMB & SSMC (discontinued)
Noise – An external electromagnetic signal which interferes with the desired signal.
Non-captive – A component such as a contact which does not have a retention feature.
Passivation – This is a surface treatment applied primarily to stainless steel. The process removes contaminating iron particles and produces a passive surface.
Peak Power – Is the maximum power which may be handled by a connector or cable.
Plug – One half of a mating pair of connectors. The plug interface normally goes outside the jack interface.
POSNS – Abbreviation for “positions”.
PTFE – Abbreviation of polytetrafluorethylene. This is the most commonly used dielectric (insulator) used in professional coaxial connectors.
QPL – Qualified Parts List. Parts approved to MIL-C-390 12 specification.
Receptacle – A term used to describe a connector assembly usually bulkhead or PCB mounted.
Return Loss – A reason for loosing RF energy due to signals being reflected due to a mismatch in a transmission line.
RF Leakage – The RF power lost from a transmission line or device. Measured in dB.
RG – The traditional prefix for MIL spec coaxial cables.
Screw-on – The mating action of connectors which are joined using a screw thread (e.g. SMC)
Sealflex2â„¢ – Cannon trade name for a flexible microwave cable assembly which has a performance similar to semi-rigid cable.
Semi-rigid Cable – A coaxial cable where the outer conductor is a solid metal tube.
Skin Effect – The tendency of alternating currents to flow near to the surface of a conductor; this increases resistance and becomes more marked the higher the frequency.
SMD – Sometimes used as an abbreviation for slide-on variants of SMB. This is a misnomer, the more common use is for Surface Mount Device.
Snap-on – A term used to describe the mating action of SMB and SSMB connectors.
Solderless SMA – An SMA connector that can be connected to semi-rigid cable by compressing the inner body rather than by soldering (sometimes referred to as semi-rigid ‘crimp’ connectors).
Stripline – A method of building a microwave circuit. The circuitry is sandwiched between 2 ground planes. Sometimes referred to as Tri-plate.
Teflonâ„¢ – DuPont tradename for PTFE.
Tensile Strength – The greatest force a device can withstand without tearing or pulling apart. This is frequently the method of determining the effectiveness of a crimp.
TNC – Thread Nut Connector same size as BNC; the only obvious difference is the coupling nut.
Tri-plate – See Stripline.
UG Symbol – Used to indicate a connector made to US government spec.
Voltage Standing Wave Ratio (VSWR) – A way of expressing the resultant loss of power as a result of signal reflections due to discontinuity.

Rubber Feet – How to Apply Self-Adhesive Rubber Bumpers

Many customers have asked about the best way to apply self-adhesive rubber feet to surfaces so that they are properly applied…and stay on the intended surfaces.

Here are the recommended application instructions:

    • Clean the surface where you will be applying the rubber feet. It should be dry and free of debris, oils and solvents. In addition, the ideal surface for rubber feet application is smooth and non-porous. You can use a mild solvent such as isopropyl alcohol to remove dirt or grease.
    • Grasp the rubber bumper on the sides without touching the adhesive.
    • Press the rubber bumper firmly into place on the application surface. The rubber foot can not be repositioned without effecting the adhesive.
    • For best results, allow 24 hours before exposing the rubber feet to heavy force or weight. This allows the adhesive on the rubber feet enough time to ‘cure’.

Besides following the above instructions when applying the rubber feet, it is important to keep the rubber feet (both storage and use) at a temperature that is between 70° – 80°F (21° – 27°C).


Opening Up and Tearing Down an IPOD Shuffle

Opening up and tearing down an IPOD Shuffle to see what’s inside…

The 3rd Generation of the IPOD Shuffle is a wonder of technology….1000 songs stored in an aluminum case smaller than a disposable lighter.

Did you ever wonder what electronic components make up the guts of an IPOD Shuffle?

You might be surprised at what goes into the circuitry of the IPOD Shuffle. In descending order by percentage of cost, the main components are:

logic, memory, metals, rechargeable materials, connectors, PCB, crystal, misc, capacitors, transistors, analog, diodes, magnetic, and plastics.

Here’s a partial breakdown by number of electronic components:

Capacitors – 65+
Resistors – 50+
Diodes – 4+

Pretty amazing what goes into equipment that measures only 45.2mm x 17.5mm x 7.8mm when fully assembled! This is possible because the components are extremely small surface mount components.

If you look at the cost breakdown by component family, it’s just as revealing. Naturally, the largest share is for memory in the form of IC’s. Over 70% (about $12.00 worth) is for logic and memory.

How To Clean Potentiometers On Your Audio Equipment

How to Clean the Potentiometers on Your Audio Equipment

If you have a dirty potentiometer, you probably will find out about it from the scratchy sounds your equipment will make when you adjust the volume control.

Here’s a simple and safe method to rid yourself of that noise:

-Unplug your equipment
-Remove the cover from the knob
-Carefully use contact spray on the shaft of the potentiometer
-Replace the knob
-Plug your equipment back in and turn it on
-Rotate the knob from one end of the range to the other.

Did that work? It should have – but if you still hear the scratchy noise, you can move onto this step:

-After unplugging the equipment again, remove the potentiometer from the housing and use the contact spray at the base. Before you put it back into the housing, rotate the shaft to be sure that it’s moving cleanly.

If you still hear noise, it might be time to replace the potentiometer. Before you cut the wires, it is recommended that you snap a couple of pictures of the previous installation including all wires leading to the potentiometer. This will assist you greatly when it’s time to connect the new pot.

Once you obtain the correct pot to install, you will need to use solder and a soldering gun to reconnect the wire leads from the potentiometer to the equipment.

Hopefully it won’t be necessary to replace the potentiometer. Most often, a spray is all it takes to rid yourself of the noisy potentiometer.

Op Amps – Then and Now

Op Amps – Then and Now

Op amp is the commonly used name for operational amplifiers, which are widely used electronic components. Op amps are often seen on many surface equipment designs and logging tools.

The name ‘operational amplifier’ comes from the use of such high gain amps in performing mathematical operations for analog computer operations and is said to have been coined in 1947. A 
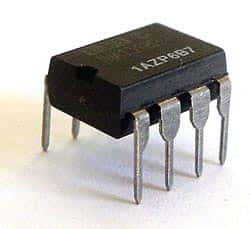
lot of study was done in the field and the initial operational amplifiers, based on vacuum tubes, were a result of the research done in Bell labs. By 1960’s, vacuum tube op amps had given way to solid state devices and hybrid operational amplifiers were entering the scene.

The first IC operational amplifier was developed in 1963 by Bob Widlar and was called Fairchild µA702. It was not a success because of a number of bugs. But Widlar’s next design, which was the µA709, was hailed as milestone in design. A number of designs followed including the very popular µA741. A number of precision op amps like OP7, OP27 and OP37 are commonly used in logging electronics.

In the initial days, these electronic components were based on NPN bipolar process and because of the slow PNP transistors of the time; the speed of the amps was limited. The LM118/218/318 model tried to solve the problem but did not meet with much success. The only fast IC op amps were the ones owned by Harris, the HA2500 as well as the HA2600, and were quite popular despite their high cost.

FET input operational amplifiers though highly advantageous in downhole tool applications, did not enter the scene due to engineering problems. However with the introduction of the ion implantation process in 1974, their manufacture became possible and the LF155/156/157 series was introduced by National Semiconductor, and OP15, OP16, and OP17 by PMI. The TL06x, TL07x, and TL08x models introduced by Texas Instruments (TI) in 1978 went on to become industry standards.

The CA3130 employing a P-channel MOS input with a CMOS output, set the stage for CA3140 having a MOSFET input and a bipolar output which caught the eye of many logging tool companies. This model has many advantages including good bandwidth and military temperature range, and continues to be used and manufactured even now.

Understanding Resistor Values

Resistors are available in a wide range of values, but if you observe carefully you will realize that certain values of these electronic components like 15k ohm and 33k ohm are easily available where as some values like 20k ohm and 40k ohm are hard to find. Let’s try and understand the logical reason behind this.

Take a hypothetical situation, where you make resistors every 10 ohm, thus giving you 10 ohm, 20 ohm, 30 ohm, etc. But once you reach the value of 1000 ohm, a difference of 10 ohm would hardly be noticeable as it is a very small value in comparison and making 1000 ohm, 1010 ohm, 1020 ohm and so on, would prove to be futile. In fact making such accurate resistors might prove to be very difficult.

Resistor

Resistor

Thus a acceptable range for these electronic components is one in which the (amount of the) step increases with the value. This is the logic that the resistor values are based upon, and they form a series following the exact pattern for every (multiple of) 10. There are two such series based on the above logic – the E6 series and the E12 series.

E6 series: Has six values per every multiple of ten with 20% tolerance. So the series goes like:10 ohm, 15 ohm, 22 ohm, 33 ohm, 47 ohm and so on, continuing to 100 ohm ,150 ohm, 220 ohm, 330 ohm with each step size (to the higher value) being higher than the last step size, and approximately half of the value.

E12 series: Has twelve values per every multiple of ten (10% tolerance). So the series goes like:10 ohm, 12 ohm, 15 ohm, 18 ohm, 22 ohm, 33 ohm, 39 ohm and so on, continuing to 100 ohm, 120 ohm, 150 ohm etc, thus it is nothing but the E6 series with an additional value in each gap.

E12 series is in common use for resistors and lets you choose values with 10% error margin, and proves to be accurate enough for most projects.