Tag Archives: Guides

The ins and outs of Peltier Cells

What Are Peltier Cells and How Do They Work?

If you join two dissimilar metals by two separate junctions, and maintain the two junctions at different temperatures, a small voltage develops between the two metals. Conversely, if a voltage is applied to the two metals, allowing a current to pass through them in a certain direction, their junctions develop a temperature difference. The former is called the Seebeck effect and the latter is the Peltier effect.

Many such dissimilar metal junctions are grouped together to form a Peltier cell. Initially, copper and bismuth were the two dissimilar metals used to form the junctions. However, more efficient semi-conductor materials are used in the modern Peltier cell. These are sandwiched between two ceramic plates and the junctions are encased in silicon.

Just as you could pass electric current through a Peltier cell to make one of its surfaces hot and the other cool, so could you place a Peltier cell in between two surfaces with a temperature difference to generate electricity. In fact, BMW places them around the exhaust of their cars to reclaim some electricity from the temperature difference between the hot gases emanating from the car and the atmosphere.

Another place where Peltier cells are put to use is the picnic basket. It connects to the car battery and has two compartments – one to keep food hot and the other to keep food and drinks cool. Unfortunately, Peltier cells are notoriously inefficient, since all they do is move heat from their cold side to the hot. Part of their efficiency is also dependent on how fast heat is removed from their hot side. Usually, Peltier cells are able to maintain a maximum temperature difference of 40°C between their hot and cold sides.

Active heat sinks use Peltier cells to keep CPUs cool inside heavy-duty computers. These CPUs pack a lot of electronics inside their tiny bodies and generate huge amounts of heat when working at high frequencies of a few Giga-hertz. Peltier cells help to remove the heat from the CPU and keep the temperature constant. One advantage in using Peltier cells for this work is the CPU can regulate the amount of heat removed. The CPU in a computer has temperature sensors inside and when it senses its temperature is going up, it pumps in more current into the Peltier to increase the heat removal.

What does the Peltier do with the heat it has acquired from the hot source? To maintain its functioning, the Peltier has to transfer this heat to the material surrounding its hot surface. Usually, this is an Aluminum or Copper heat sink, which then transfers the heat to the atmosphere.

Active heat sinks that are more exotic use heat-conducting fluids to transfer the heat away from the hot side of the Peltier cell. These are specially formulated fluids with high thermal conductivity running in pipes over the hot surface of the Peltier. As the Peltier gets hot, the fluid takes away the heat and changes to a liquid of a lower density. Convection currents are set up, causing the hot liquid to move away to be replaced by cooler liquid, aiding heat transfer. Heat from the hot liquid is removed in a heat exchanger in a different part of the computer.

Parental Control V-Chip – What is it and how does it work?

Parents are concerned over the type of programs their children watch on the television and would like to exercise their control. They do not want their children watching programs with excessive violence or sexual content. Since it is not possible to be always present when the children are watching TV, it is best to have a device automatically detecting the type of program coming through, and blocking it if it is objectionable.

All television sets made and sold in the US after 1999 have a special electronic chip built in and this is the V-chip. This allows parents to select the level of violent programs, which children can watch in the home. This also means that all TV programs contain a rating transmitted along with the program, which the V-chip can detect.

The FCC defines the ratings as –

TV-Y – Suitable for all children, with no violence and no sexual content
TV-Y7 – Suitable for children aged seven and over
TV-G – Suitable for general audiences, with no violence, no sex and inappropriate language
TV-PG – Parents to exercise their own discretion
TV-14 – Suitable for children above 14 only, with some violence and sex
TV-MA – Suitable for mature audiences only and may contain sexual situations and/or graphic violence

A parent can program the V-chip with a specific rating, and the chip will block all programs or shows above that rating. For example, if you have programmed a V-chip for a TV-G rating, it will allow all programs with a rating of TV-G, TV-Y7 and TV-Y, and will block all the rest.

All television programs transmit synchronizing signals, which allow a proper build-up of the picture on the screen. The electron beam painting the picture on the screen starts to sweep from the top left corner to the right edge of the screen, turns itself off, retraces itself to the left edge and sweeps again to the right edge, moving down a tiny bit in the process, until it has covered the entire height of the screen. The beam then returns from the bottom right hand corner of the screen to the top left hand corner and the whole process repeats. The vertical and horizontal retrace signals transmitted along with the TV program control all this.

As the signal returns from the bottom of the screen to the top, it follows a number of horizontal retrace lines. The twenty-first line of the horizontal retraces has data embedded in it as specified by the XDS standard. This includes captioning information, time of the day, ratings information and many others.

The V-chip is capable of reading this line 21 data, extracts the rating’s information and compares it with the parent’s allowed rating. Accordingly, the chip lets the signal pass through or blocks it.

The V-chip in the television works in conjunction with the cable box and/or the VCR. You can either utilize the V-chip or turn it off.

Do surge protectors save energy?

Most modern electronic gadgets are not meant to be switched off. Rather, they are placed in a state of suspended animation called standby. Gadgets in standby perform some basic background functions until their user recalls them for full functionality. The benefit to the user is an instant response from the unit against having to wait for it to resuscitate.

However, all this comes at a price. Units in standby mode need power, however small, to keep them ticking. For those powered from a battery, need to replace or re-charge their batteries more often. Those drawing power from the utilities’ outlet, consume a tiny amount of power in the standby mode, and if the design of the gadget is not proper, this may amount to energy up to one-tenth of their normal consumption when fully operating. Multiply this with the number of such gadgets all over the house or office, and you will notice the standby consumption forms a substantial chunk of the yearly electricity bill.

People use surge protectors to save their expensive electronic gadgets from going bust with high-voltage surges appearing on the power outlets in homes and offices. These are long strips of connectors allowing plug-in of multiple gadgets. Equipment connected to these strips are saved from the marauding surges because the strip has a device called an MOV inside it followed up with a fuse. The MOV shunts the high-voltage surges and prevents them from reaching the plugged-in equipment.

Apart from the connectors, MOV and fuse, the surge protector strip also has a master switch with which all the gadgets connected to the strip can be switched on or off. Irrespective of the individual gadgets being in full operation or in standby, flipping the master switch to the off position cuts off power to all equipment connected to that strip. This essentially means none of the equipment can draw any more power, not even for their standby operation.

Switching off all equipment from the wall outlet with their individual switches can be a daunting task, especially if there are a number of gadgets connected and the wall outlet switches are difficult to access. After a few days of diligence, people usually give the switching off routine a miss and the equipment remain in a standby mode, consuming their share of energy.

Since surge protectors have a master switch, it is simpler to switch off a number of gadgets at a time, and thereby, cut down on the consumption of standby power. For example, you may have a TV, a few computers, a printer and a few battery chargers hooked up to one surge protector strip. When leaving at the end of the day, switching off individually would be troublesome. However, flipping the master switch on the surge protector strip may not be a big deal.

Therefore, the proactive user is actually saving the energy by remembering to flip the switch on the surge protector strip. If the user forgets to flip the switch, the surge protector strip does not save any energy.

Protection with Surge Protectors – Why and How

If you have once had your TV, audio system and other electronic equipment destroyed by a voltage surge during a thunderstorm, you will surely know how to prevent this from happening once again. For preventing such drastic accidents, it is common to use a device called the surge protector, and to have the maximum protection, it is important to know why it is required and how it works.

Most people know of a surge protector as a long strip of electrical power connectors, which power sensitive electronic gadgets. However, two components inside the strip provide the actual protection. One of them is the Metal Oxide Varistor (MOV), and the other is the familiar fuse. The combination of an MOV and the fuse protects your electronic gadgets by limiting the voltage delivered.

Normally, all households and offices experience power surges many times during the day, including at night. The surges are generated when nearby appliances are switched on or off. Appliances such as microwave ovens, air conditioners, refrigerators and pumps switch on and switch off periodically. When they switch, they create a disturbance in the electrical supply lines, causing either a voltage dip or a voltage spike, or both. Since all electronic gadgets have a limit to the level of voltage they can withstand, any spike over and above the limit will have a damaging effect.

A thunderstorm is another factor generating a power surge. Even if lightning does not strike a home directly, it is enough if it hits a power line nearby. The power lines feeding a home can carry this surge in and can cause massive damages. Using a surge protector largely prevents all this.

The MOV inside a surge protector has a special property. As long as the voltage across it does not cross its specified limit, the MOV remains a passive device, with a very high resistance. When a surge arrives, and is above the voltage limit, the MOV lowers its resistance immediately. This causes a massive current to flow through the MOV. The increased current also flows through a fuse, which precedes the MOV, causing the fuse to blow and cutting off any further supply to the MOV and any connected gadget. In the absence of a fuse, or the fuse not blowing because of improper rating, the MOV may burn out allowing further spikes to be passed on to the gadget.

An MOV has a specific voltage rating and the spike expected at the point of use defines the rating selected. The telephone industry uses a special type of surge protection, known as Gas Discharge Tube or GDT, at specific points where the telephone lines enter a building. A GDT operates at a much higher voltage as compared to an MOV, and offers protection from higher voltage surges.

For working satisfactorily, an MOV and a GDT both need a good electrical earthing and a proper earth-wire connection.

11 secret controls on your iPhone headphones

If you have any Apple brand device, chances are you have at least one pair of their headphones laying around. If you use them on a regular basis, here are some tips to get the most from your Apple headphones:

During phone calls:
1 – Incoming calls: Tap the center button to answer a call
2 – Ignore a call: Long-press the center button to ignore the call – you should hear 2 ‘beeps’ and you will know that the caller was successfully sent to voice mail
3 – Swapping calls: Tap the center button once to swap calls – Hold the center button down for about 2 seconds to end the new call
4 – Disconnecting/Hanging up: Tap the center button once again to hang up

When listening to music:
5 – Toggle pause/play: Single tap the center button
6 – Skip a song: Double tap the center button
7 – Return to the previous song: Triple tap the center button
8 – Fast forward a song: Tap the center button two time; long-press the second tap
9 – Rewind a song: Tap the center button three times; long-press the third tap.

Using the camera function:
10 – Shutter Release: Tap the volume-up button to snap a picture. This trick will help you get very steady shots.

For Siri users (iPhone 4S and above):
11 – Activate Siri: Long-press the center button

Remember – any Apple device that utilizes their headphones and have these functions (i.e. iPad and iPod) can also take advantage of these features. Do you know of any headphone tricks that we’ve missed? Send them our way!

How to wipe a hard drive clean

If you are donating, disposing of or selling anything that contains a hard drive, chances are that drive should be wiped clean before it leaves your hands. Even if the hard drive has failed, special equipment can read a hard drive which could expose your private and confidential information to the next owner.

So what should you do before your dispose of your equipment with a hard drive? There are several methods that are recommended by the experts. Here is an explanation of two of them:

1 – Destruction:
According to the National Institute of Standards and Technology Special Publication 800-88, “Destruction of media is the ultimate form of sanitization.” Some methods to destroy a hard drive include pulverization, incineration, melting, and shredding however it should be noted that it is recommended that you never burn a hard drive, put a hard drive in a microwave, or pour acid on it in an effort to destroy it. Those methods should be avoided. What IS recommended is that you drive a nail through the hard drive, being sure to pierce the hard drive platter. This can be accomplished with a hammer and nails or even a drill. If you use this method to destroy the hard drive, drive several nails through or drill through it several times. Another method is to remove the hard drive platter and sand it to erase the data.

Destroying the hard drive ensures that you or anyone else will never be able to use the hard drive again. Should you want someone to be able to use the hard drive again, you might consider another option which is data destruction software.


2 – Data Destruction Software:

Sometimes called hard drive eraser software or disk wipe software, data destruction software is a way to remove your personal data off of a drive without permanently destroying the drive. While not a fool proof method (user error comes into play here), it is the easiest way to wipe a drive clean. Data destruction software overwrites a hard drive in a particular way to make extracting data from it very difficult, if not impossible. Most computer users should be able to safely wipe their hard drive clean using this type of software.

There are other methods available however they are generally expensive. Either of the two methods outlined above should suffice for the average computer user that would just like to wipe a drive clean before disposing of it.

Solder Sucker for Desoldering – New product alert!

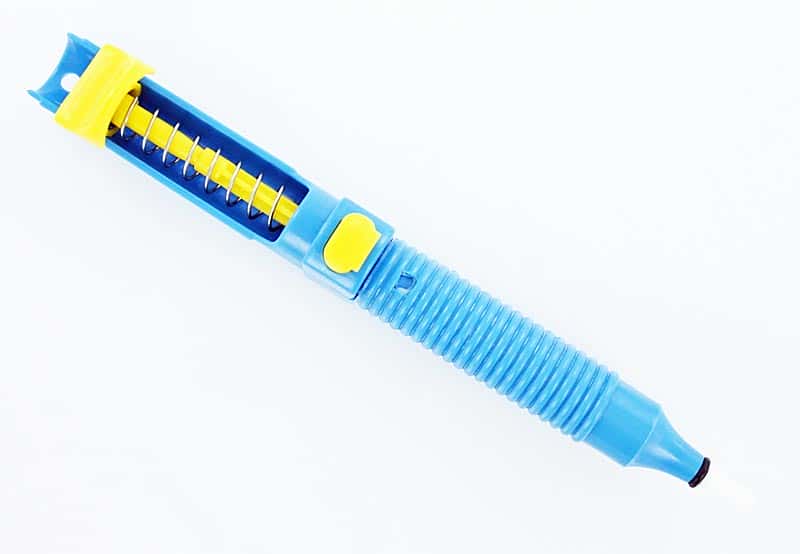
Solder Sucker

Solder Sucker

We’re always adding new electronic components, parts and supplies to our inventory. This week, one of our new products is a solder sucker, which is a ‘must have’ for anyone that works with electronics and solder.

Crafted in Germany by Amax, this solder sucker is a pump style solder remover. Use it on heated solder to remove the solder from your boards and components. It comes in the original manufacturer’s packaging with instructions for the use and care of your solder sucker.

Here are some basic desoldering instructions:
1. Heat your soldering iron. Push down on the plunger until it clicks to arm the soldering iron.
2. Clean your soldering tip. Place the soldering tip on the side of the old joint. Apply some fresh solder on the old joint to help the old solder soften.
3. Set the plunger on the solder sucker. Place the tip of the solder sucker on the old joint as close as possible to the soldering tip.
4. Release the plunger by pressing the button.
5. Repeat until much of the old solder is gone.
6. If any of the old solder is left in PCB holes, you can heat the old joint again and using the soldering tip on one side and a miniature flat screwdriver on the other, gently rock the joint back and forth lightly to loosen up the tiny leads on the components.
7. You may need to repeat this process again when there is a stubborn joint.
9. Remove your component carefully; taking care to not damage the board.

Wire Bending Radius Guide

At West Florida Components, we get asked very often about wire bending radius. It is important to have guidelines when working with wire or cable in your projects, particularly projects that involve curves, ductwork and buildings. There are a few rules of thumb that come into play when you think about the bending radius of wire and cable. Following these rules will ensure that your wire and cable projects go off without a hitch!

Here is a chart to use: https://www.westfloridacomponents.com/wire-bending-radius.html

Solar energy can help sell your home

Anyone who is trying to sell a house knows that some improvements like adding a new bathroom or a complete kitchen renovation may increase the value of a home however most people might not consider that an investment in solar panels or other renewable energy sources may be another positive investment in their home.

According to a study that was recently published by the National Bureau of Economic Research (NBER), solar photovoltaic (PV) panels added on average between 3 percent and 4 percent to the value of a home. This study, which examined homes in California, suggests that homeowners might fully recover their costs of purchasing and installing solar panels when they sell their home. Since solar panels require very little maintenance and are becoming increasingly more affordable to buy and install, this is another way to increase the resale value and marketability of your home. Some of the most common installations in homes are for water heaters, pool heaters and outdoor lighting. As the technology improves and the cost of solar panels continues to drop, more and more homeowners (and potential buyers!) will be looking for solar energy systems for their homes.

West Florida Components in the community making LED Throwies

West Florida Components was recently invited to participate in a science experiments fair held in conjunction with the USF Education Department.

Each business staffed a booth where elementary school aged kids along with their families could conduct science experiments. The community event was an opportunity for families to enjoy and see the benefits of science in a fun atmosphere. The West Florida Components station was one of about 18 stations at which participants could interact and have fun with science. The event met a significant need identified at the national, state and local levels which is to increase the scientific literacy of students as a way to improve the local, state and global competitive status of our communities and our country.

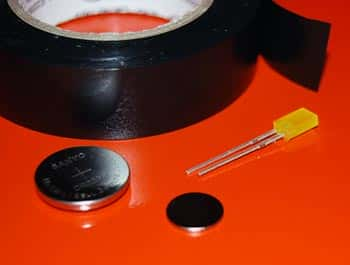
The staff from West Florida Components made LED Throwies with the fair attendees. Each family member was given an LED, a 3V battery, a magnet and some tape to put their LED Throwie together. Once the Throwies were assembled, they could toss their Throwie at a metal board to earn points. The families learned the science behind the Throwie and were given additional LEDS to take home to so they could rebuild their throwies and experiment further.

If you’d like the instructions to make the LED Throwies, you can visit our web site where we give full instructions with pictures.