Category Archives: Raspberry Pi

Embedded Pi and Raspberry Pi

To extend the functionality of your tiny single board computer, the credit card sized Raspberry Pi or RBPi you can consider using the Embedded Pi or E-Pi. With E-Pi, your RBPi will be able to interface to Arduino shields even without making use of any Arduino device. For example, the E-Pi RBPi combination can drive a TinkerKit Sensor Shield using a set of actuators/sensors such as LED actuator, button sensor, tilt sensor and a relay actuator.

You may be an intermediate RBPi user or a novice just starting out with the SBC. Using the Embedded Pi will allow you to work with the combination of E-Pi, RBPi and sensor shields for controlling a set of actuators and sensors. In addition, you will learn to write Python code for controlling and detecting the state of the actuators and sensors.

The RBPi can be of either model A or B. For installing the Embedded Pi demo software and the necessary software updates for the RBPi, you will require network connectivity. Since more than two USB devices will be connected, a USB2 hub is recommended. Most likely, you will be connecting the keyboard and mouse through the USB hub along with the WiPi. To link the monitor, use either the HDMI interface or the RCA phono connector, if your monitor accepts composite video.

The Embedded Pi offers an interface platform for connecting the RBPi, Arduino and the embedded 32-bit ARM processor. The Instructions and the E-Pi form a bridge to link the RBPi and the Arduino shields. Physically, this interface takes the form of a cable linking the GPIO connectors on the RBPi and the E-Pi board. On the software side, the linking is achieved by using Rpi.GPIO and WiringPi modules.

The TinkerKit Sensor Shield allows various sensors and actuators to be connected. You can connect them directly to an Arduino or to the E-Pi, without any breadboard in between. There are 12 standard 3-pin connectors on the Sensor Shield. Of them, 10-15 are Analog inputs, 00-05 are the analog outputs. You can drive them with PWM capable outputs or you can configure them as digital inputs.

The TinkerKit uses LED, Relay actuator, button and tilt sensor that are plugged into the 00-05 pins on the Sensor Shield. Both sensors and actuators can be simultaneously used.

To use the E-Pi, connect all the peripherals such as the USB2 hub, mouse, keyboard, WiPi, monitor, etc. into the RBPi and start using the demonstration software. In the next step, connect the RBPi, E-Pi and the Sensor Shield together. Use a flat-flex cable to link the RBPi and the E-Pi together, making sure that the red edge on the flat cable confirms to the proper alignment of the interfaces. On the E-Pi, it is necessary to set jumper JP1, so that its power bus voltage is at 3.3V. Additionally, use only JP3 and not the JP4, such that the E-Pi is configured for the RBPi.

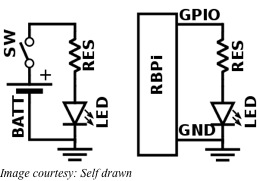
Now connect the LED module with the 3-pin twisted wire cable to the Sensor Shield to its orange sockets – the analog output. Use the epi-leds-rgv1p0p0.py program to run and light up the LED. For further details, see the element-14 site.

Use a K-Type Thermocouple with the Raspberry Pi

Whether you are working in a lab, at home, in the office or in the field, occasionally one needs to have the capability to measure the temperature of different sorts of materials such as solids, liquids and chemicals. The temperature range involved may be small or large – its measurement usually requires the use of a thermocouple. This is not very easy to interface, as you need a sensor amplifier that has to measure a very small voltage generated by the thermocouple.

In general, type-K thermocouples are useful in most applications. Extension grade K-type thermocouples are made of Nickel and Aluminum alloy conductors good for measuring a temperature range of 0-200°C. However, other constructions are available that can measure a temperature range of -270 to 1260°C. Thermocouple conductors, when subjected to a temperature gradient, generate a minute amount of voltage – this is called the Seebeck effect. Type-K thermocouples have a nearly linear voltage output versus a temperature gradient. This simplifies interfacing to an electronic circuitry.

The ADS1118 development board from Texas Instruments (TI) is a ready-made platform for using the K-type thermocouple with the Raspberry Pi or RBPi, the tiny credit card sized single board computer. The development board comes with a k-type thermocouple and a high-resolution LCD module. Using eight jumper wires, you can connect this board to the RBPi via the SPI pins on its GPIO. Alternately, use an adapter board to plug in the ADS1118 development board directly to the GPIO pins on the RBPi. Follow the diagram on the left.

The advantage in using an RBPi for interfacing a thermocouple is you can check up on the temperature of your experiment remotely via your smartphone or your PC. The basic idea is to use the RBPi as a web server and to project the temperature measured as a figure on the website that comes up. The following diagram sums up the entire scheme –

The RBPi interfaces with the ADS1118 development board to collect the temperature data via the Serial Peripheral Interface or SPI. It passes this information to the Webserver and application logic. The RBPi also runs a JavaScript in the background for the Webpage content and browser side.

On receiving a request, the web server delivers the webpage containing the temperature data, updating it frequently. This allows remote monitoring of the temperature data from your smartphone or PC. You only have to point your browser to the correct IP address of the webpage.

TI provides a wealth of code for the MSP430 micro-controller on the ADS1118 board. Usually, temperature measurement is a little more than the simple read the ADC value and convert to temperature. It usually involves compensation for the cold junction. For the ADS1118, this means reading another temperature sensor reference on the board. The code does the job of interleaving the readings of the internal sensor and the external thermocouple.

Additionally, the readings need to be corrected for the non-linearity of the thermocouple for accurate interpretation of the thermocouple voltage into temperature. The TI code includes the non-linearity of the thermocouple and translates the ADC value accordingly to actual temperature.

Raspberry Pi Can Open Your Garage Door from Anywhere

Using a Raspberry Pi, you can have a garage door that opens with a command from your smartphone. Additionally, if you are away from home, no matter how far, you can always keep a tab on whether your garage door is shut. The tiny, credit card sized single board computer, the Raspberry Pi or RBPi is used here as a small web server. The page served by this web server will give you a big red button when you access it via your favorite browser.

Pressing the red button will trigger the garage door via a relay. That needs a very simple circuit to be connected to the GPIO pins of the RBPi. The uploaded website will trigger this circuit, which in turn will trigger the relay. The relay contacts will close the circuit to turn the garage motor on and the motor will open the garage door. Another press on the red button will again trigger the connected circuits so that the garage door now closes.

You can use whatever RBPi model available. Additionally, you will need a Wi-Fi adapter, a power supply unit, a 5V relay, a 2GB SD card and some wires. On the SD card, install and optimize the OS Raspbian. This can be the shrunk version of Debian Wheezy – get the image here and follow the installation instructions. Just a tip – use gparted on any Linux computer such as Ubuntu, for format the SD Card to fat32, then dd to write the image on it.

Once the image is installed, plug the SD card in, connect the USB keyboard and hook up the RBPi to a suitable monitor. The first-boot of Wheezy will take you automatically to rasp-config. This tool allows you to stretch the partition and enable ssh. In case you do not want the GUI, use the apt-get command to purge x11-common and autoremove the rest – this will free up some space on the SD card.

Next, use the command line to set up the Wi-Fi so that you will be able to control the RBPi remotely via ssh – use this guide for Wheezy. If you are using the Mode A of RBPi, it has only one USB port. Therefore, for setting up the configuration, you will need your keyboard plugged in. Once the configuration is done, shutdown the RBPi, unplug the keyboard, then plug in the Wi-Fi dongle and reboot the RBPi.

If everything has been done perfectly, the Wi-Fi will be set up and the router will assign your RBPi with an IP address. This will be evident in the boot log of your RBPi if you have a monitor connected to it. Alternately, login to your router and look up the DHCP table. Login to your RBPi through ssh on your Linux PC – type ssh pi@[IP address of your RBPi], with default password as raspberry.

You will need to login, download, compile and install WiringPi – use this guide. This allows complete control of the GPIO pins on the RBPi. Follow the instructions here to control the relay using the RBPi.

XMP-1 the Raspberry Pi Robot

XMP-1 the Raspberry Pi Robot
The inexpensive, credit card sized single board computer, the Raspberry Pi or RBPi, can be teamed up with another inexpensive, credit card sized processor platform, the XMOS startKIT. The duo presents the unique possibility for DIY enthusiasts to construct robotics applications. An additional incentive – almost no soldering required.

The XMOS StartKit comes with an XMOS processor chip that has multiple XMOS cores. You can program these cores directly in C. Multiple programs will run in parallel within the XMOS cores, at high speeds and without jitter. That is exactly what the robotics applications ideally require.

The combination of the RBPi and the XMOS startKIT makes a simple mobile platform that its designer Shabaz chooses to call as XMP-1 – the XMOS Mobile Platform, version 1. Using only simple tools such as pliers, wire-cutters and a screwdriver, XMP-1 involves only low-cost off-the-shelf standard hardware. It is flexible enough to allow addition of more sensors and programming to make it more versatile than it is at present. The XMOS board communicates with the RBPi via the Serial Peripheral Interface or SPI and you can control the XMP-1 from a web browser.

Although XMP-1 can move at quite a high speed, it is preferable to keep its speed low when it is being taught a new route. The console output and the browser controls are available on the display on the web browser to generate keep-alive and status messages to help you see what is happening. Shabaz has recorded this project in three parts, the first of which deals with programming the XMP-1 that has no sensors. In part two, Shabaz conducts more XMOS startKIT experiments. These serve to establish the process of high-speed SPI communication between the XMOS startKIT board and the RBPi.

You will be able to get the XMP-1 up and running, if you simply take the code, compile it and plug it into the flash on the XMOS startKIT board and the RBPi. However, this project is useful to all types of enthusiasts apart from those only interested in constructing and using XMP-1. For example, on the site, you will get adequate help in the XMP-1 hardware assembly, controlling hardware using RBPi and using a web browser to do it from a remote location. The site is very informative for those who are new to the XMOS startKIT.

The RBPi is connected to the network via an 802.11 Wi-Fi USB adapter and handles all network activity. A small web server running on the RBPi provides feedback to the user via a web browser. The RBPi also transfers the motor control speeds it receives from the user over to the XMOS startKIT board via the Serial Peripheral Interface. In turn, the XMOS startKIT feeds the motors with the correct Pulse Width Modulation or PWM signals.

Based on these input signals, the hobby servomotors operate to allow the XMP-1 to run at varying speeds in a straight line or to take a turn. Usually the servomotors rotate to less than a complete revolution – within a range of nearly 180-degrees. The output shaft is connected to linkages that make the wheels turn a full right, a full left or anything in-between.

An Oscilloscope with the Raspberry Pi

An Oscilloscope with the Raspberry Pi
Making a full-fledged oscilloscope with a Raspberry Pi or RBPi, the unique low cost SBC, may be beyond the scope of many enthusiasts, but here is a proof-of-concept that RBPi can handle such a project. Although not a very practical oscilloscope, it does provide several oscilloscope-like capabilities. Additionally, all this comes at a very low cost and not much of soldering is involved – impressive incentives for any DIY enthusiast to start on the project.

The oscilloscope project has additional incentives for those seeking to advance their learning curve. Information available in the project and experience gathered during the execution may be reusable for applications involving analog sensing and plotting data onto a screen. It is perfectly possible to project the output onto a larger screen as the output of the oscilloscope is available to view in a web browser. Therefore, this project could also be used to display low-frequency waveforms in an environment that does not have a real oscilloscope. The RBPi oscilloscope is quite responsive and refreshes the display several times a second.

To make the oscilloscope all you need is an RBPi, an XMOS startKIT board and a few wires. The XMOS startKIT is another credit card sized board containing the XMOS multi-cored processor. When compared to other similar processors in the market, the XMOS processor comes with a host of advantages for projects that require real-time operations. This is especially true for data-logging purposes, as the chip also contains a 12-bit ADC or Analog to Digital Converter built into it. Having all this on a single low-cost board makes the whole arrangement very attractive for connecting to the RBPi.

Although a multimeter is a very useful instrument, it cannot show electrical signals varying over time beyond a certain rate. With the RBPi oscilloscope, you can do that see more than what the multimeter tells you. Of course, it is not the intention here to make an oscilloscope with all the features that a professional scope has. However, the project does offer some oscilloscope-like features such as sweep modes, trigger capability and on-screen cursors for trace measurements.

Unlike a regular oscilloscope, the RBPi scope lacks the entire front-end. Therefore, it does not possess a good sample rate, has no front-end filters, is without any AC/DC input capabilities and there are no gain adjustments. In fact, the XMOS Analog Examiner is good enough only to examine simple circuits at low speeds. The XMOS board actually collects analog data and transfers it to the RBPi over the Serial Peripheral Interface or SPI. The RBPi runs a web server and the XAE application using JavaScript and Node.js. Anyone connecting to the XAE application via a web browser can see the data plotted as a graphical curve.

The XMOS processor can run multiple tasks in parallel, thanks to its multiple cores that can execute different codes. The XMOS cores communicate with each other using the concept of channels. Additionally, the XMOS chip also has a 4-channel ADC built in. This ADC can resolve at 12-bits or 4096 points at 1 MSps or a million samples per second. For further details on this oscilloscope, refer to this site.

Raspberry Pi Compatible Multicore Development Board

If you are looking for a low-cost development platform for adding to your low-cost, versatile, credit-card sized, single board computer, the Raspberry Pi or RBPi, a startKIT might be just what you need. With a startKIT attached to your RBPi, you can have real-time Input/Outputs and several communication features including networking and audio, making it an ideal platform for varied applications such as digital audio, networking, motion control and robotics.

This ultra-low-cost development platform for the RBPi is made by XMOS, featuring the configurable multicore micro-controller technology – xCORE. These are an innovative family of devices that you can configure with software for a wide variety of interface and peripheral blocks. Equipped with header connections, startKIT can easily be interfaced to RBPi products. That makes it the ideal real-time IO solution for projects involving the RBPi.

XMOS provides free-to-use design tools along with the startKIT. These xTIMEcomposer design tools offer developers the right interface configurations, allowing them to write application codes quickly, using C/C++, all within a single programming environment. Developers get a full graphical development with the xTIMEcomposer, which includes a compiler, a static time analyzer, a software-based logic analysis tool and a debugger.

The entire board of the startKIT measures just 94x50mm. The kit is based around the xCORE-Analog multicore micro-controller, the XS1-A8-64-DEV. The xCORE runs at 500MIPS and has eight numbers of 32-bit logical processing cores. Along with the multicore micro-controller, the startKIT comes with an array of LEDs, 2 capacitive sense sliders, a push-button switch and a sliceCARD connector. The sliceCARD connector is compatible with several IO slices that XMOS makes available. You can connect the startKIT board to a breadboard system, as it is equipped with suitable header connectors.

For new users to start with the startKIT, XMOS provides several wide-ranging example codes. These include a web-server application, a software-defined Ethernet interface and the basic driver software necessary for operating the on-board LEDs and the push-button. If you want more, you are free to join the XCORE Exchange, a thriving community of users at xCORE; you will have access to a large variety of xCORE code.

The on-chip debug capabilities of the on-board xCORE multicore micro-controller, XS1-A8-64-DEV, allows the developer an in-circuit analysis of the complete design in comprehensive real-time. That makes it easy to see what is happening in real-time at the device interface and in the code – while the system is running – all without affecting the performance. You can also monitor the analog interfaces alongside the digital signals of the startKIT. For example, you can monitor the signals on the capacitive touch-sensors in real-time.

For those who work with applications such as digital audio, networking, motion control and robotics, the eight 32-bit logical cores of the 500MIPS xCORE multicore micro-controller can perform deterministically. Therefore, you can configure the startKIT to match your exact requirements as the software allows you to configure the interface.

The xCORE-Analog A8-DEV is a two-tile device. While Tile-0 handles the integrated debugger and USB PHY, Tile-1 is dedicated to the user-programmable eight logical cores, with its digital IO available on pins. That allows several types of peripherals to be integrated with the startKIT board.

Raspberry Pi Gesture Control

Many smartphones are capable of gesture control, where the phone can sense movement of the owner’s hands near it and respond accordingly. Now you can add the same features to the versatile credit card sized single board computer, the Raspberry Pi or RBPi. The features are provided by the Microchip 3D Gesture Controller, the MGC3130 GestIC and a 3D Touchpad.

The hardware you will need for implementing the gesture control is the MGC3130 Hillstar Development Kit, a 5V, 1.2A power supply with a microUSB connector and an RBPi Model B, preferably V2. Initially, you will need access to a PC for parameterization and for flashing the firmware on the MGC3130. After the flashing is over, the MGC3130 can communicate directly with the RBPi via the GesturePort available of the tiny MGC3130 board on the Hillstar dev kit. The Hillstar board needs signals EIO1, EIO2, EIO3, EIO6 and EIO7, which the RBPi supplies via its GPIO connector.

3D gesture sensing and control applications require capacitive sensing, which the MGC3130 handles aptly. You can either power the Hillstar board from the USB charger, or let the RBPi power it up directly. Once connected, the MGC3130 senses the North-South and East-West hand flicks. The EIOx pins flag the gestures sensed to the RBPi, which then acts on them according to actions already assigned.

The GestIC controller has Aurea, a free graphic shell working around it. Aurea allows parameterization of several planes of different sizes and configuration. These planes make up the capacitive sensing pad and you can calibrate and configure them with good precision. For programming, you will require the Raspbian OS Debian Wheezy – version January 2014, Python – version 2.7.3, RPI.GPIO – version 0.5.4, Tkinter and Leafpad. All the above software are already included in the Raspbian OS. To demonstrate the functioning of the gesture controller, you can use the python code for the game “2048” – 2048_with_Gesture_Port_Demo.py.

The software package for the MGC3130 contains all the relevant system software and its documentation. The package, provided by Microchip, contains the PC software Aurea, the GestIC Library binary file, the GestIC Parameterization files, CDC driver for Windows and the relevant documentation. You can use the Software Development Kit, also from Microchip, for integrating the MGC3130 into a software environment, as it includes a C-reference code for the GestIC API, a precompiled library for the Windows operating system. It also includes a demo application (the game “2048”) that uses the GestIC API interface on the Hillside Development Kit.

The Hillstar Development Kit provides a reference electrode of 95×60 cm for the touchpad. This consists of one Transmit and a set of five Receive electrodes – one each for north, east, south, west and center positions. These electrodes are placed in two different layers. To shield the Transmit electrode from external influences, it has a ground layer just underneath.

The five Receive electrodes include the four frame electrodes and one center electrode. The frame electrode names follow from their cardinal directions, that is, north, east, south and west. The maximum sensing area is defined by the dimensions of the four Receive frame electrodes. The center electrode is positioned to get a similar input signal level as received by the four frame electrodes.

LED Indicator for the Raspberry Pi

Some projects are attempted not because they have any ulterior value, but simply because they are fun to do and involve learning for the uninitiated. The Raspberry Pi or RBPi is a low-cost, compact single board computer platform that came into being for the sole purpose of teaching youngsters how to program computers. However, its popularity has grown beyond its primary mandate. Making an indicator light come up for notifications is a simple fun project, which shows how to set up notifications and how to hook up an LED module to an RBPi.

To start with, for this project you will need a functional RBPi unit with Raspbian installed on it. In case you are new to RBPi, you can catch up with this tutorial on how to get started – it is essential that you have the basics covered before getting on. In addition to the RBPi unit, you will also need an LEDBorg module, available from PiBorg and a clear or frosted case for your RBPi. The clear/frosted case for the RBPi is not an essential item, but it conveniently hides the RBPi card and the LEDBorg module, while allowing the LED light to shine through – this offers protection as well as makes the project look neater.

Strictly speaking, even the LEDBorg is not an essential item to use. You could connect a series resistance to an LED and use the combination instead. Using the LEDBorg only makes it easier for the project as it provides a compact unit that is designed to fit directly on the GPIO pins of your RBPi. If your RBPi is turned on, power it down, open the case and orient the LEDBorg module correctly before plugging it in.

While orienting the LEDBorg module, make sure the logo on the board comes closest to the RCA connector on the RBPi board, while the edge of the LEDBorg is flush with the RBPi board edge. While the case is open, take care to cover the indicator LEDs on the RBPi with opaque tape so as not to confuse the LEDBorg LED with the RBPI power and network indicator LEDs. Once the LEDBorg is plugged in and the extra LEDs are covered, you can close the case and power up the RBPi to move onto the next phase of the project.

Depending on whether your RBPi is a revision 1 or a revision 2, and the kernel version in use, you will have to download the specific software package for the LEDBorg from the PiBorg website. Now open up a terminal on the RBPi to download and install the package. This will give you the GUI wrapper for driving the LEDBorg through your RBPi. To check if the module is functional, pick any color in the demo mode of the software and test it. The only thing that remains now is to use scripts to change our LED into an actual indicator based on notifications.

For example, you may want to turn on the LED if there is rain forecasted in the weather report. Follow this tutorial to link up your LED with the weather forecast. The same tutorial will also tell you how to light up the LED if you have received mail in your Gmail account.

An Introduction to the Raspberry Pi GPIO

gpioThe highly popular, tiny, single board computer, the Raspberry Pi or RBPi has a row of pins along one of its board edges close to the yellow video out socket. These are its general purpose input/output or GPIO pins and one of its very powerful features.

The RBPi needs these pins to interact with the outside world physically. To simplify things, you can think of them as switches that you can control as inputs or that the RBPi can control as outputs. Of the 26 pins available, nine are for power and ground, while the rest of them (seventeen) are the GPIO pins.

You can set up these pins in different ways to interact with the real world and do fantastic things. It is not strictly necessary that the inputs come only from a physical switch. It might be the input from a sensor, a device or even a signal from another computer, for example. You can use the outputs for anything from turning on an LED to sending data or a signal to another device.

For example, if your RBPi is on a network, you can remotely control devices that are attached to it, while those devices can send data back. The RBPi is ideal for connecting to and controlling physical devices over the internet and that is powerful and exciting thing.

Playing around with the GPIO can be safe and fun, provided you follow some rules and instructions. It is very easy to kill an RBPi if you randomly plug wires and power sources into it – therefore the caution. You could also do a lot of damage if you connect things to your RBPi that use up a lot of power. For example, connecting LEDs to your RBPi is fine, but connecting motors are not. For those newly introduced to the RBPi, using a breakout board such as the Pibrella is a safer alternative than to use the GPIO directly.

For using the GPIO as an output, the RBPi replaces the power source and a switch in the external circuit. For instance, when an LED is to be lit up, generally a battery is used as a power source and a resistance is necessary to limit the current flow. A switch offers the means to turn the LED on or off. All these are connected in series for the circuit to operate.

To control the LED from an RBPi, you can safely omit the battery and the switch from the circuit. You can individually turn on or off each output pin of the RBPi. Additionally, when the pin is on or digitally HIGH, it outputs +3.3V and when it is off or digitally LOW, it outputs 0V. The next step involves instructing the RBPi when to turn the pin on and when to turn it off.

GPIO inputs on the RBPi require some more work. The RBPi senses an input signal on a pin based on whether there is adequate voltage present. The voltage presented by a sensor must be within levels specified for the RBPi to sense it as digitally HIGH or digitally LOW. Sensing analog or continually varying signals usually needs another interface called ADC or Analog to Digital Converter.

RemotePi: An Intelligent Infrared Remote Controlled Power Switch for the Raspberry Pi

When you have built a mediacenter system using the tiny single board computer, the Raspberry Pi or the RBPi, there is usually a hand-held infrared remote to manipulate the various controls. However, using the remote to switch off/on the mediacenter system does not switch the RBPi. Adding a RemotePi board lets you switch on/off the power of the RBPi safely with the remote or a push button.
There are two versions of the RemotePi board – one that fits the RBPi Models A+ or B+, and another that fits RBPi Models A or B. Although electrically similar, RBPi Models A+/B+ are different from Models A/B – the mounting holes and connectors are differently placed. Therefore, you must select the RemotePi board to fit your current RBPi model.

Additionally, the RemotePi board comes in two variants. The first has the IR receiver and LED integrated on it, while the second variant sports an external IR receiver and LED connected by a cable. The second variant is useful when you want to mount the RBPi and RemotePi out of sight, leaving only the IR receiver and LED visible for the users.

The RemotePi works by re-routing the power to the RBPi, instead of feeding it directly. On the board, a micro-controller manages the power line to the RBPi. Depending on the command received from the push button on the board or the infrared remote control, the micro-controller switches power on or off for the RBPi.

However, when switching off the power to the RBPi, RemotePi does not cut off the power immediately. Instead, it sends a notification to the RBPi via a signal on its GPIO port. The RBPi monitors this signal on the GPIO port continuously via a script running in the background. Once triggered, the script initiates a clean shutdown of the OS and thereby, prevents data corruption. Once the shutdown is successful, RemotePi then proceeds to cut off the power completely to the RBPi.

When the RemotePi has to switch power to the RBPi from an infrared remote control, you must teach the unit to recognize the type and button preferred. For this, you let the RemotePi enter a learning mode and then point your remote control towards the infrared receiver on the board. Now press the preferred button on the remote you would like to use in future to control power to the RBPi and the RemotePi will remember the button. For using a different remote or button, simply repeat the process.

Another feature of the RemotePi is that you can teach it to use one button to power off the RBPi and use another to switch the power back on. Apart from controlling power, the RemotePi board will forward any received infrared signal to the RBPi. Therefore, you can use the remote control for the mediacenter as well as use LIRC for the RBPi.

RemotePi prevents data corruption on the RBPi with sudden power outages. Additionally, you can reboot the RBPi to clear memory leaks or for automatic updates. It does not occupy a USB port and is totally compatible with the simple GPIO IR receiver.