Category Archives: Customer Projects

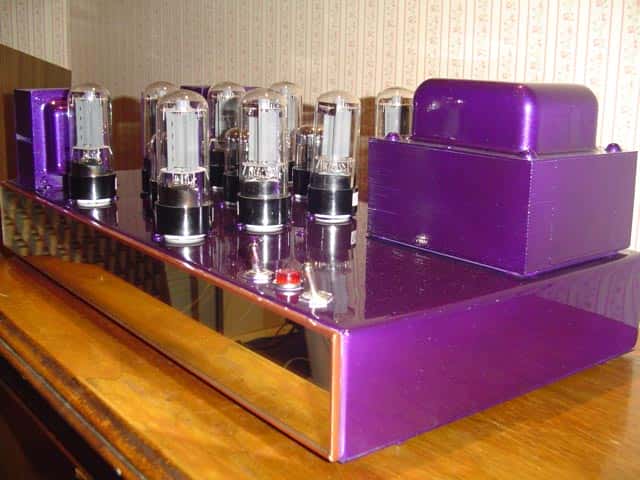
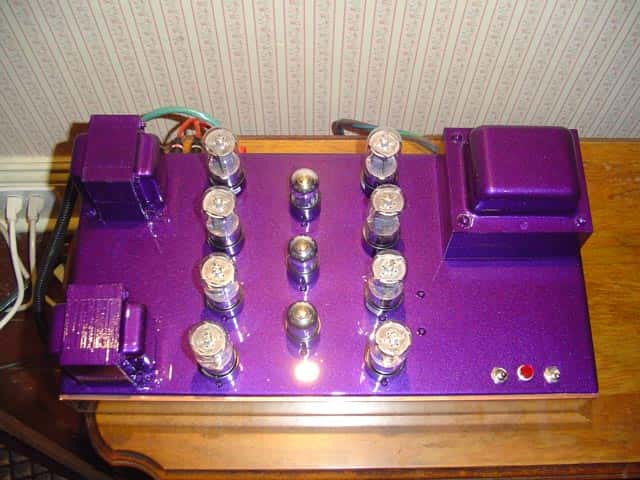
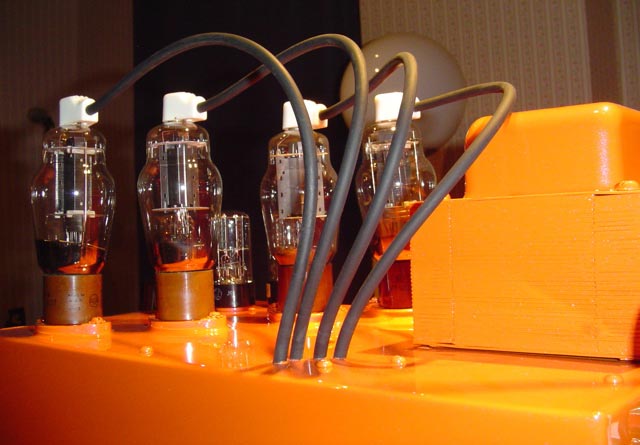
A New Vacuum Tube Amp – Flash Quattro!

Steve from Canada has just sent us some pictures of his latest creation. This one is fantastic!

Here’s what Steve had to say about it….

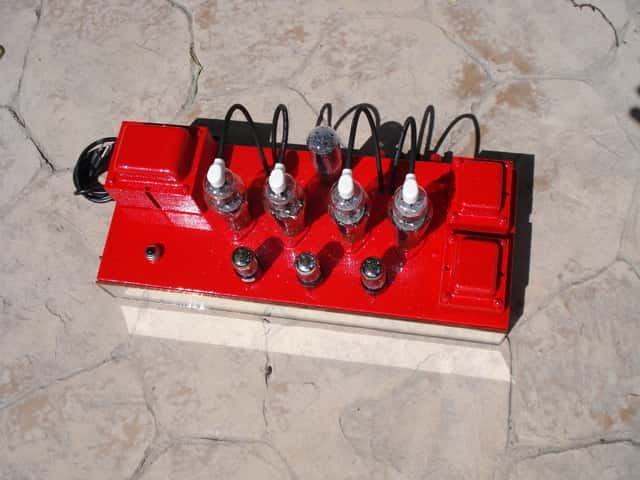
Hello everyone, meet Flash-Quattro.  That means “four flashes”.  I
chose the name because the 807 tube is very art deco and it made me
think of the 1930’s series ‘Flash Gordon’,   and there are four of them
hence the name,- simple!

This is the latest version of the ‘Book-shelf’ amp series, like the
Caterpillar and Firecracker amps, this one is long and lean.

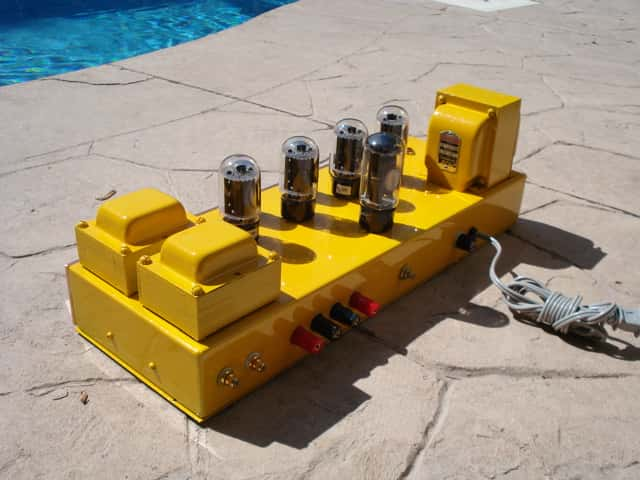
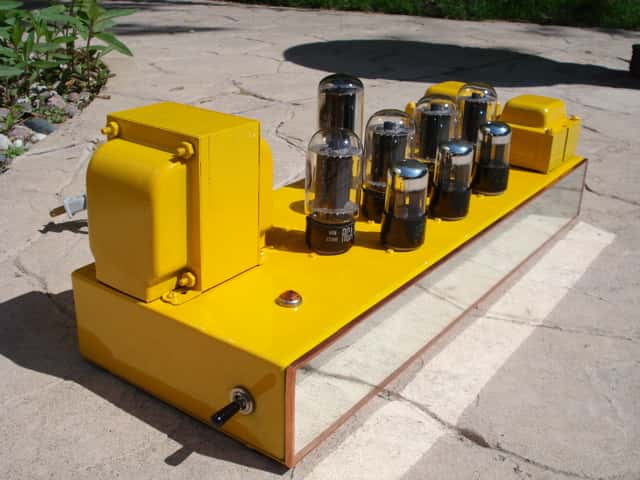
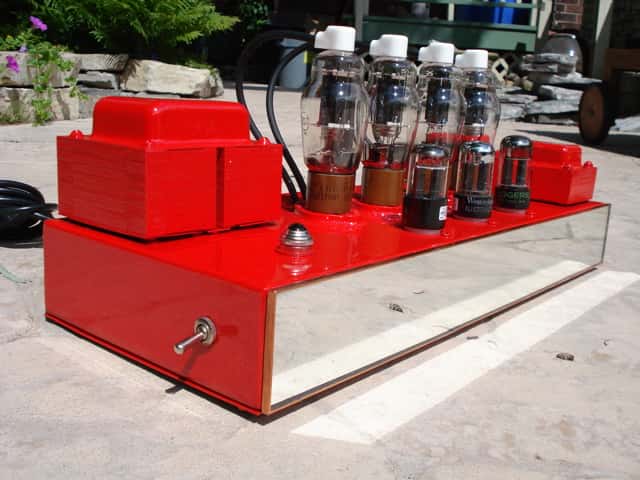
Now about the amp, it’s a push-pull 807 putting out 40 watts per channel or so,  in tetrode.  Rectification is with a 5R4, but you can choose to use 5U4
or 5Y3.  All supply the amp with more or less voltage and will change
the personality of the sound a bit.  I like the 5R4 so that’s why it’s
there.  Input tubes are a trio set of 6SN7GTB’s.

The output transformers are those nice Seeburg units that have Ultra-linear taps, but as I mentioned, I connected them in tetrode because I prefer the
sound of tetrode.  These outputs have impedance taps for 1,4,8,16 ohms.  A selector switch on the back of the amp allows you to switch
impedances ‘on-the-fly’ so you can choose and compare the taps you like
for what ever speakers you’re using at that time.  There is no problem
using the 4 ohm tap on an 8 ohm speaker, it how it sounds to you.

The power transformer is a Lowrey unit and a plate voltage of 373 vdc.
Classic green jewel light and side toggle On/Off switch.  Painted by my
good friend Joel Luttrell, and having his signature touch, a flawless
mirage of firecracker red (yes the same red as used in the
‘Fire-Cracker’ amp) and ice-pearl sparkles.  Apparently a fly decided
to do the back-stoke in the final coat of clear, so Joel had to pluck
out the fly, buff, and add more coats of clear.  Knowing Joel, there’s
probably 10 or more coats of clear here!
Take a look…..
vacuum tube amp


vacuum tube amp


vacuum tube amp


As always – thanks for sharing, Steve. We are amazed!

Opening Up and Tearing Down an IPOD Shuffle

Opening up and tearing down an IPOD Shuffle to see what’s inside…

The 3rd Generation of the IPOD Shuffle is a wonder of technology….1000 songs stored in an aluminum case smaller than a disposable lighter.

Did you ever wonder what electronic components make up the guts of an IPOD Shuffle?

You might be surprised at what goes into the circuitry of the IPOD Shuffle. In descending order by percentage of cost, the main components are:

logic, memory, metals, rechargeable materials, connectors, PCB, crystal, misc, capacitors, transistors, analog, diodes, magnetic, and plastics.

Here’s a partial breakdown by number of electronic components:

Capacitors – 65+
Resistors – 50+
Diodes – 4+

Pretty amazing what goes into equipment that measures only 45.2mm x 17.5mm x 7.8mm when fully assembled! This is possible because the components are extremely small surface mount components.

If you look at the cost breakdown by component family, it’s just as revealing. Naturally, the largest share is for memory in the form of IC’s. Over 70% (about $12.00 worth) is for logic and memory.

Solar Panels for Boats

Solar panels can easily be installed and utilized on boats for power. There is very little maintenance required to keep them in working condition and if properly installed, the solar panels should last 10 years or more.

The first decision is what kind of solar panels to buy. The most efficient option are mono-crystalline solar panels. Not only are they efficient, they are the most widely available. You might also consider using poly-crystalline panels which are slightly less efficient as the mono-crystalline type. If you have concerns about shade, you can buy the thin film solar panels.

Your next decision is where to install them on your boat. It is recommended that you install them high and aft on your boat, and in direct sunlight. One suggestion would be to install them maybe over the cabin or above the davits. The goal is to avoid installing them where the shadows might affect their performance. If shadows are an issue, consider installing them on a rail along the stern or over the bimini.

If your solar panels are shadowed, even just one complete row of cells, you will not be generating any power. The solution would be to either move the solar panels to a location that is not shadowed or to use a shade resistant amorphous solar panel.

Keep your solar panels operating at their maximum efficiency by wiping off any residue laying on the surface of the panel. Solar panels generally require little maintenance and are able to withstand the outdoors, so think about how you might be able to use them to power your boat.

Custom Tube Amps Are the Best Sounding

Steve White from Canada has been busy building more custom tube amps.

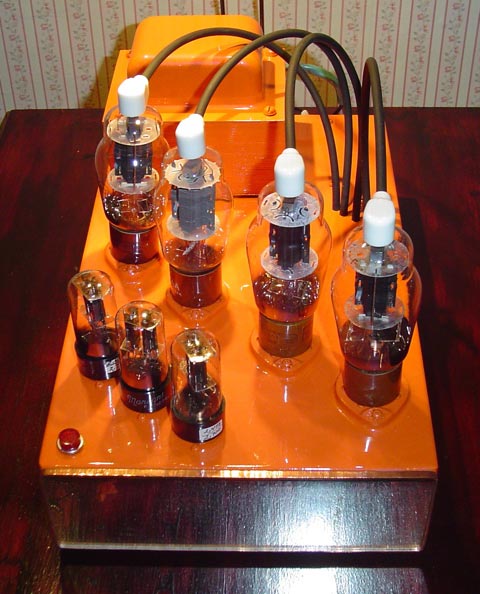
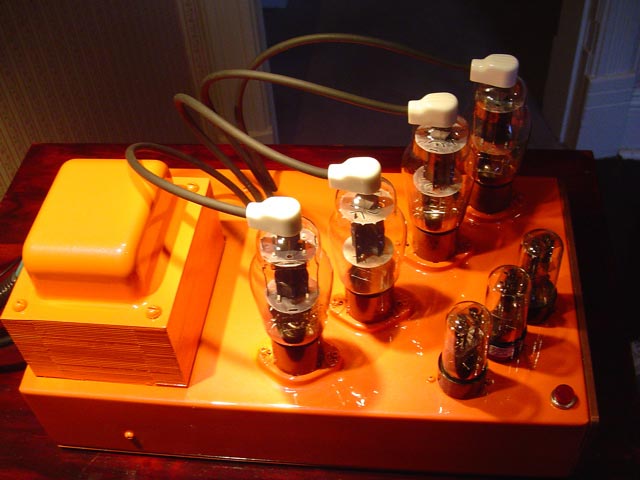
Here’s a beauty that Steve painted ‘caterpillar yellow’


Here’s what Steve had to say about his latest project:

So, here’s the new Caterpillar tube amp. Geared to appeal to the heavy
machinery crowd. Painted the classic Caterpillar yellow with brilliant
white sparkles in the paint. Painted by Joel my painter. This amp is
40 watts per channel. 355vdc on the plates of the 6L6 tubes. Selector
switch to go from 4-8-16 ohm speakers, a nice heavy duty on/off switch
on the side, and a authentic classic jewel pilot light.

Just beautiful! Check out more of Steve’s creations here: Vacuum Tube Amplifiers

He’s at it again! New Vacuum Tube Amplifier from Steve

Wow! Congratulations to our customer, Steve White, on his recent interview with the The Peterborough Examiner where Steve talked about his made-from-scratch vacuum tube amplifiers.

Steve sent some pictures of his latest project. He says it’s the biggest and most powerful amp that he’s made to date.

Here a new one. This is the biggest and most powerful amp I’ve made
yet! It’s a Push-Pull-Parallel 6L6 putting out a conservative 80 watts
per channel. I think I’ll keep this one for a while….
It has 8 of your 470 uf 400 volt electrolytic capacitors in it and one
of those small mylar coupling caps also.

Take a look for yourself…..

As always, great work, Steve.

Custom Tube Amp in Time for Halloween

Steve W. from Peterborough, Ontario, Canada sent me some new pictures of his latest projects.

He built this particular amp for himself. It’s a 40 Watt per channel 807 that used 8 of our 470uF 400V Electrolytic Capacitors .

The finish is blue perl clear coat – that finish is perfection!

We’ll be posting more of Steve’s custom tube amps over the next couple of days.

As always – great job, Steve!

Halloween Amp

Halloween Amp

Halloween Amp2

Halloween Amp

Halloween Amp3

Halloween Amp

Desoldering – Why is it Necessary and How is it Done?

Soldered joints, if improperly done, may need to be ‘desoldered’ or the solder removed in order to resolder them. A poorly soldered joint can result in failure of the electrical circuit over a period of time. This can happen for a number of reasons. Low quality solder or failure to properly clean the surface before soldering or even lack of proper technique and corrosion of the joint due to leftover flux, movement (shake) of the joint before the solder has cooled may all cause a poor soldered joint.

There are other reasons you might need to desolder a joint. Desoldering and resoldering may also be required in order to replace a defective electronic component or if you are troubleshooting an electrical circuit.

One common method of desoldering is to use a desoldering pump which is a vacuum pump similar in operation to a bicycle pump in reverse. The spring loaded plunger breaks the solder and gets sucked away by the pump. Repeated operation of the pump may be required in order to completely desolder a joint, or you can also use the solder pump to take up the bulk of the flowing solder and finish up the job with solder wick. Either way works – the solder wick is more expenisve so you may want to use both if you have a large job. Be careful – the pump should be operated carefully so that no damage the PCB or the electronic components occurs.


A solder wick or braid is an alternative to desoldering pumps. Here the copper wick is placed over the joint and the solder is melted by means of soldering iron. The solder gradually flows into the wick and hence gets removed. The wick must be removed from the PCB before it cools down as otherwise it may damage the board.

What Happens to Old Electronic Components and Boards?

We came across this blog post the other day and thought it was worth bringing here.

Here’s an excerpt:

Yesterday I had the opportunity to shoot video in a facility that is the largest company in America that recycles the glass from electronics and computers. The men who own this company, built the machines that separate and break up the glass, themselves.

Electronic products and computers are torn apart. The plastics are sold to one vendor while the electronics and circuit boards are sold to another. The glass fragments are then shipped to companies that melt it down and produce new glass.

I was impressed by how much of the material is able to find new life, rather than to be dumped into a landfill where it would simply sit for all time.

I hope that he’ll update his blog when this segment is aired – I’d love to see the whole process!

How to Read Capacitors

Capacitance Values – and How to Read Them

Capacitors are used in a wide range of electronic components and circuits. They form an integral part of electronics. The capacitance of capacitors is measured in a unit known as Farads, represented by the letter ‘F’. A capacitor that has higher capacitance can be used for storing more charge as compared to one with a smaller capacitance value.

One Farad is a very high value for capacitance and usually smaller units are used, namely pico farad, nano farad etc. And as the capacitors are physically very small in size, their capacitance needs to be identified with a code mentioned on the capacitor itself. The exception to this is electrolytic capacitors that are big enough to have the capacitance value written directly on them.

Ceramic and film capacitors usually have a coded value marked on them. If the value marked on them is a two-digit whole number, then the capacitance is equal to the value mentioned in pico Farads. Thus a code of “10” implies that the capacitance is equal to 10 pico farads.

A three-digit whole number includes the first two significant digits, and the third digit as the multiplier (indicating the number of zeroes), and gives the value in pico Farads. Thus a code of “104” means, 10 multiplied by 10,000, giving the capacitance as 100,000 pF or 0.1 uF.

If a decimal number is used as the code on the capacitor, then the capacitance is equal to value mentioned in micro Farads. For instance, “.1” mentioned on the capacitor would imply 0.1 uF.

Finally, a whole number followed by the alphabet ‘n’ means the capacitance is equal to value mentioned in nano Farads.

In addition to the capacitance, the code on these electronic components can also be used for indicating the tolerance, voltage, and temperature properties.

470pF 3000V Capacitor

470pF 3000V Capacitor

In the example above, the capacitor reads:

471M

3KV

The 471 is deciphered as 470pF; M=20% tolerance; 3KV=3,000V

Here are the codes for tolerance:

B +/- 0.1pF
C +/- 0.25pF
D +/- 0.5pF
E +/- 0.5%
F +/- 1%
G +/- 2%
H +/- 3%
J +/- 5%
K +/- 10%
M +/- 20%
N +/- 0.05%
P +100% ,-0%
Z +80%, -20%

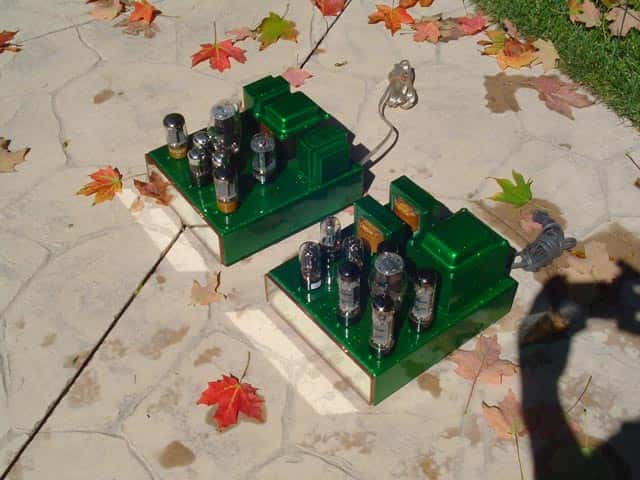
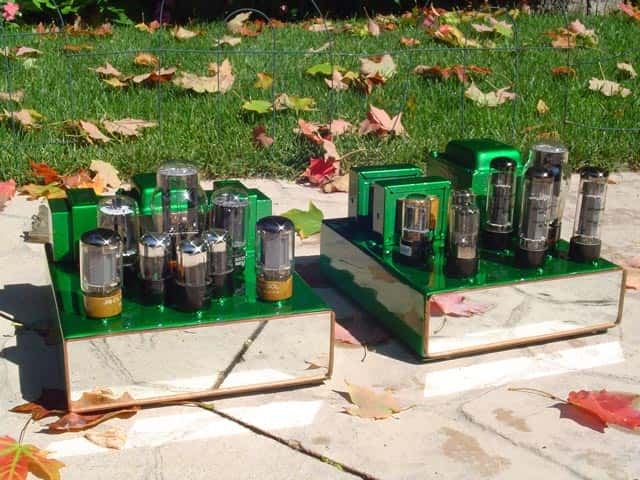
It’s TWINS! Customer Project: 6L6 / EL-34 Vacuum Tube Amplifiers

We are always honored when customers share their recent projects with us. Very often they’ll send us pictures of the completed projects where they’ve used electronic components from our web site.

Steve from Peterborough Ontario Canada shared some pictures of his recently completed vacuum tube amplifiers. Steve is one of a handful of folks that can build these from scratch.

We were blown away by the amount of work and the craftsmanship and asked Steve if we could share these with our customers on our web site. You can see the original project photos here:

Custom Vacuum Tube Amplifiers

Below are some new pictures of twin 6L6 / EL-34 amplifiers that Steve just completed…

(Steve – not only were we very impressed by these latest amplifiers, we’re a little jealous that you already have leaves changing color up by you!)

Thanks for these pictures, Steve! Continued success to you!