Category Archives: Customer Projects

How to Jailbreak an iPad

Jailbreaking an iPad

If you have an iPad, you may be intrigued by the thought of jailbreaking it.

Jailbreaking a device permits you to install and use third party applications and utility programs. In the case of a jailbroken iPad, you would be able to then run apps like Adobe Flash which is not available through the Apple OS, or access files like you can on a PC. One app that caught my eye was the multitasking app which would allow you to run multiple programs without having to save/close them. Another great app called Wi-Fi Sync gives you the flexibility to sync your iPad with Wi-Fi – no plugged in USB required.

Of course, jailbreaking the iPad is not without risk (the number one concern would be warranty) but PCWorld.com has put together the definitive guide to jailbreaking your iPad. In fact, PCWorld’s guide is so complete, it even gives you instructions on how to revert back should you get cold feet (or have to go back).

Once you’ve hacked your iPad, be sure to avoid the iPad updates from Apple since your device can be reverted to the non-jailbroken state. Should that happen, you can jailbreak your iPad again after the update is installed.

PCWorld – How to Jailbreak an iPad

Make an inexpensive & simple UV LED Torch

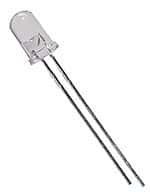
UV LEDFrom our friends at instructables comes an easy project for use with UV LEDS.

To make this simple project, here’s what you’ll need:
2 Ultra Violet LEDS
1 1/4W resistors (the value of the resistor needs to be calculated based on the forward voltage of the LED you use)
1 non-working 9V battery (or a 9V battery clip)
1 new 9V battery
Pliers
Solder
Soldering equipment

The full instructions on the Instructables site will show you how to put everything together. Once assembled, the light snaps on to a working 9V battery to function.

Keep in mind, you don’t have to use UV LEDS for this project – you can use any color. Just adjust the resistor required based on the forward voltage and forward current of the LEDS you choose.

Buying LEDS without specs or you don’t remember the specs of the ones you have sitting around? Assume a max of 2.8V – 3V and 20mA. I would think high intensity white LEDS would work really well for this project.

I haven’t put this one together myself yet, but I think a few of these are coming with me on my next camping trip. Nice way to light up the tent and the ‘facilities’ late at night. Fun project – and you probably already have everything you need right on hand.

Turn your old PC fans into mini wind generators

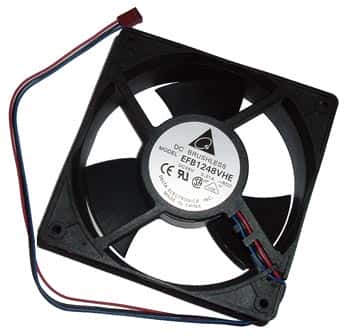
pc fanHere’s a great project that you can do either to experiment with wind turbines or to generate some energy! While the amount of energy produced is not overwhelming, this project can sure get your brain moving in the right direction.

The best thing about this project is that you probably already have everything you need lying around:

  • Thick plastic bottle
  • Old PC fan, bigger the better!
  • A few feet of small wire
  • A piece of wood about 1.5″ square and around 20cm long
  • Two lengths of steel tubing that slide inside of each other, about 1/2″
  • 6 Schottkey diodes
  • Epoxy
  • Super Glue
  • Zip ties
  • An old CD

You can find the full instructions including video here: http://www.instructables.com/id/Upcycle-your-old-PC-fans-into-mini-wind-generators/

If you want to have a kid-friendly wind turbine kit that already has all the pieces you need, we sell one of those. Our kits come with full instructions and all the materials needed to try your hand at creating a source of renewable energy – a wind turbine. The kit also comes with different experiments you can try with your wind turbine once it’s assembled. Great project for summer for the kids!

What is a wind turbine?

A wind turbine is a rotary device that draws energy from the wind. This is different from a windmill, which draws energy from the wind but that energy is directly converted into mechanical energy used by some sort of machinery. Wind turbines are converted into raw electricity.

There are two main types, horizontal and vertical axis, of which the horizontal axis is more common. What are the differences between these two? Horizontal-axis turbines have the main rotor shaft and generator at the top of the tower. Horizontal axes must be pointed into the wind in order for them to work properly. However, the structure of the blades facing the wind also gives them a great angle of attack, which is the angle at which they have contact with the wind. This insures that the blades will be very efficient when converting wind to energy. Vertical-axis turbines are basically the same, except the axis is vertical, and they have the advantage of not having to face the wind.

Wind turbines are made up of three main components, the rotor component, generator component, and structural support component. The rotor component makes up about 20% of the cost, and consists of the blades. The generator component makes up 34% of the cost, and consists of the electrical generator, the control electronics, and usually a gearbox component for converting the low speed incoming rotation to high speed rotation which is better for generating electricity. Finally the structural support component makes up about 15% of the cost and consists of tower and rotor yaw mechanism.

Installing wind turbines can be a great way to save money on your electrical bills and create your own energy. They can be bought pretty inexpensively or you can even build your own and get the supplies to do it for even cheaper. If you are interested in building a basic wind turbine to see how it works, you should buy an educational wind turbine kit to get you started.

Make a coin battery – great electronics project for kids!

What better way to illustrate how to build a basic electronic connection than to use coins to build a battery?

Here’s what you need:

Quarter

Quarter

quarters or dimes
aluminum foil
blotter paper (see below)
salt
cider vinegar
wire (short length of both black and red wire – ~16 gauge)
1 LED (any through hole LED)
scissors
pen or marker
voltmeter (optional)

~~~~~~~~~~~~~~~~~~~~~~~~~~~~~~~

Trace the coins on the aluminum foil and blotter paper. Cut out 10 of each so that you have 10 circles of aluminum foil and 10 circles of blotter paper.

(Blotter paper can be found in the art store or the art section of your local craft store. You can also find blotter paper in the cosmetics department. If you can’t locate blotter paper, then you can also try using thick paper towels.)

Mix a small amount (1/4 cup) of vinegar with some salt. Stir the salt until dissolved. If the salt can not dissolve, then you’ve added too much. Add some additional vinegar and stir. Soak the circles of blotter paper in the vinegar and salt mixture.

Stack the foil, blotter paper and coins as shown in the video. It is important that the foil not touch the other layers. Let the ‘battery’ stand for about 15 minutes to develop a charge.

Connect each lead of the LED to a short piece of wire; the black wire connects to the negative lead and the red wire is attached to the positive lead on the LED. Place the exposed end of negative wire on the bottom of the ‘battery’ touching the foil, and the end of the positive wire to the quarter on top of the stack.

Optional: Use the voltmeter to measure how many volts are generated by the battery. A battery with 6 or more cells should be able to light up a standard LED with no problem!

Custom Console Stereo

For those of you wanting to hear just how good a custom built vacuum tube amp or console stereo will sound, here’s a video from Steve at Custom Tube Art which shows the workmanship of his projects and the quality of the sound.

Steve had this to say about his latest project:

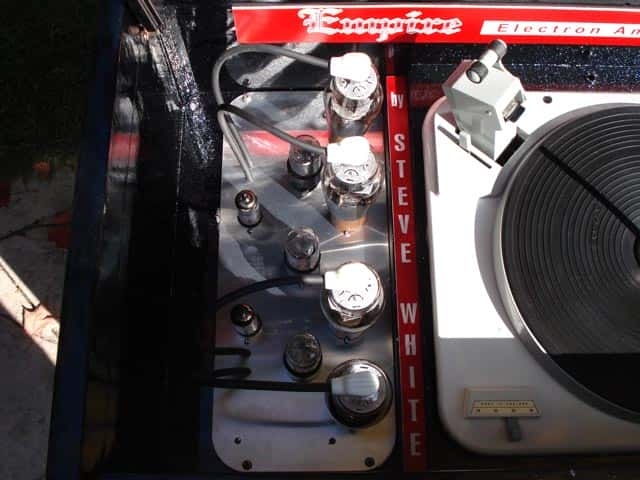
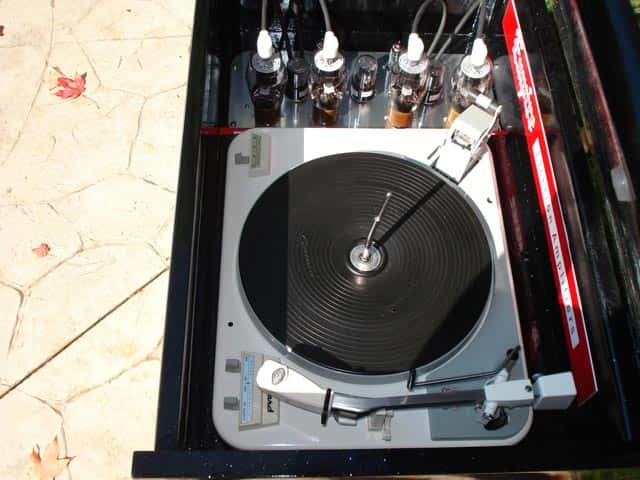
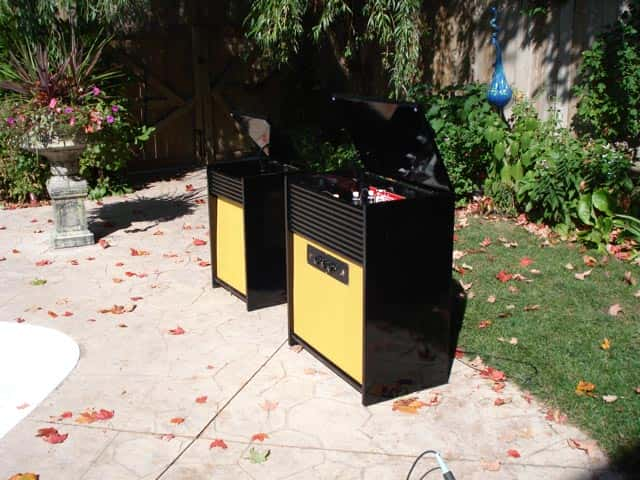
Here is a 1960’s style custom console stereo I built displaying the vacuum tube amplifier right next to the Garrard type A turntable. The 807 tube amplifier has a conservative output of 30 watts per channel and uses 6SN7 and 12AU7 pre amp tubes. The speakers are a pair of Jensen 15″ drivers and a pair of DeForest 3″ tweeters in each cabinet. The entire project took two months to build.

You can see more of Steve’s custom work on his Vacuum Tube Amp web site.

The Titan – Newest (and biggest) Vacuum Tube Amp from Steve

Just in from our friend Steve W. in Canada (who constructs the most amazing vacuum tube amplifiers)…

The best way to describe this next amplifier is it’s a Titan. It has to be the biggest, baddest, heaviest and most powerful amplifier I’ve made to date! Weighing in at just under 60 lbs. this push-pull-parallel EL-34 / 6L6 is conservatively rated at 110 watts per channel using EL-34 tubes. Capable of driving 4 or 8 ohm speakers via a switch on the back panel, this amp is a tube roller’s dream.

Simply by plugging in which rectifier tubes you want to use, be it a pair of 5Y3’s, 5R4’s, 5U4’s or even 5AR4’s you can match the correct plate voltage with what ever power tubes you choose, be it a set of 6V6’s, 6L6’s, 5881’s Kt-66’s, Kt-77’s, EL-34’s, or even 7591’s.

You also have the choice of running the amp in push-pull instead of push-pull-parallel simply by not installing the front four power tubes and switching off one of the two rectifier tubes via a switch located on the right hand side of the chassis. The signal and phase-inverter pre amp tubes used are my favourite large dual triodes 6SN7’s.

Now, about the transformers, seeing that this amplifier has to drive thirteen tubes, I thought it only made sense to use a separate filament power transformer. The transformer right next to the larger power transformer is the 20 amp filament transformer. By doing this, I’ve removed the heater load off of the main power transformer which now only has to supply the high voltages the amp needs.

Along with a hefty octet of 470 mfd 400 volt capacitors bought from West Florida Components, there is more than enough capacitance to keep this amp in the black during those high current moments when the music demands it.

By sharing the load this way, the main power transformer will not be taxed nearly as much. The output transformers are massive Hammonds that can easily handle the wattage this amp delivers.

You will notice a volume control knob located right smack in the middle of the mirror in front of the amp that’s surrounded in pure copper foil, and that is because this is a fully integrated power amp with a line stage pre amplifier built into it. That means you do not need to buy a separate pre amplifier. You only need to plug in your CD player, satellite, MP3, I-pod, or what ever type of line stage device you like to use, directly into the amplifier.

There are two benefits to an integrated amp, one, you don’t have to go out and spend money on a separate pre amp, and two, you are amplifying completely with tubes throughout the whole amplifying process from pre amp to power amp, and that makes it sound better, way better!

Once again – amazing job, Steve! Thanks for sharing this with our readers.

A Console Stereo: Steve’s Legacy Project

We continue to be amazed at the work that our friend and customer from Canada, Steve White, does.

Luckily for us, Steve graciously shares his talents by allowing us to post pictures of his recent projects.

Here’s what Steve said about his console stereo:

If I were to ever to have a legacy, this project would have to be it! Ever since I was 5 years old I’ve wanted a console stereo. 38 years later and I finally have one.

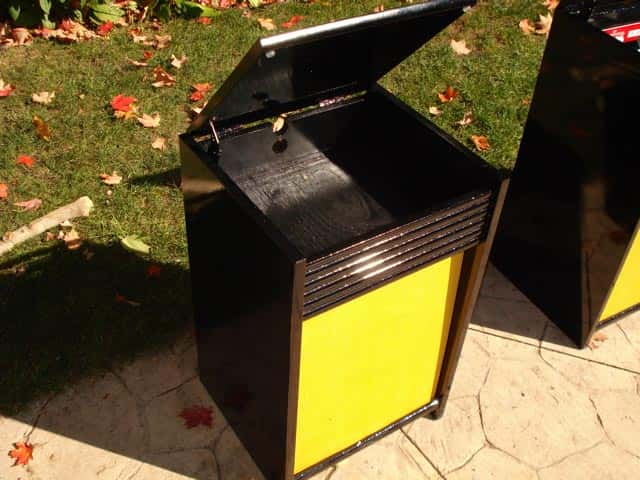
I took 2 old Magnavox cabinets that were originally the same size (both same as the large one) and added to the larger one to accommodate the turntable, and shrunk the other to be a satellite speaker to allow you place it where ever you wanted to in your room to give you the true stereo separation.

I then painted the cabinets Jet black with ice-pearl sparkles. I wanted the tube amplifier to be displayed unlike in older consoles, right next to the turntable, because to me the amp is art! I then completely restored this 1962 Garrard turntable that was reclaimed from an old console, and put the whole thing together.

Here is the result…. Sounds really nice too!

Job well done, Steve!

Round, Cylindrical or Hemispherical: Rubber Feet Dilemma Solved

You need some rubber feet but don’t know what shape to buy? Look no further. Here is the information you need.

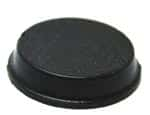
Do you want the top of the self-adhesive rubber feet to have a flat surface? You should choose a cylindrical rubber foot. Cylindrical rubber feet are basically shaped like a coin….flat top, and flat bottom.

They are perfect for situations where you need to use them between two flat surfaces. Some suggested uses are for the back of pictures and art hung on the wall; for kitchen and bathroom cabinets to cushion the close; and craft projects like coasters and stained glass projects. We’ve even seen them used to place sheets of glass on tabletops to separate the glass from the surface underneath. Cylindrical rubber feet are available in both clear and black.

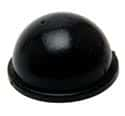
Do you want the self-adhesive rubber bumpers to be rounded? Then you need to purchase hemispherical rubber feet. Think of a ball cut into half – rounded on one side; flat where the adhesive attaches to the surface.

Hemispherical rubber feet are perfect for separating electronics equipment to help air circulate between two boxes. They are also ideal for applying to surfaces when you need a little bit of a grip on the surface underneath.

Here’s a unusual use for a hemispherical rubber foot: Apply with the adhesive side down on a bookshelf or display cabinet to hold propped up items in place. Clear rubber feet work perfectly on glass shelves! Like cylindrical feet, hemispherical rubber bumpers are available in clear or black.

RGB Tricolor Flashing LEDS – Exciting New Product!

West Florida Components has just started to carry an exciting new product – RGB Tricolor Flashing LEDS!

At first glance you might think “Why are they calling them both RGB AND Tricolor?” The reason is that each LED is actually 3 separate LEDS housed in one case.

They operated in a sequence: first one color is lit at a time, then two light up, then all three. The cycle is completed when all three LEDS have been lit slowly, then begin to flash. Max voltage is around 3V.

We were trying to think of some interesting uses for these LEDS. Certainly they’ll be fun to use around the holidays – in garland or in wreaths or other holiday projects. How about as a centerpiece? They would also be great for costumes and for jewelry making.

Here’s a challenge for our customers:

Use your imagination and find a great project to use these in. We’ll feature the best suggestions/projects in a video on our home page!