Author Archives: K J

Motor Start Capacitors vs Motor Run Capacitors

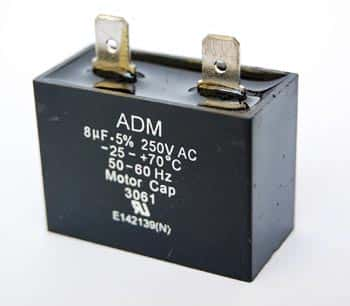
motor run capacitorWe are often asked about the difference between the two different types of motor capacitors: motor run and motor start. Here are the basic differences between the two:

Motor Start Capacitors
The primary purpose of a motor start capacitor is to briefly increase the motor starting torque as well as to allow a motor to be cycled on and off very quickly. It operates in the circuit by staying active long enough to allow the motor to be brought to 3/4 of it’s full capacity. It is removed at that point by a switch in the circuit. You will find that the voltage rating is often one of these four: 125VAC, 165VAC, 250VAC, and 330VAC.

Motor Run Capacitors
Motor run capacitors will then operate after the circuit is started. Using a motor run capacitor will run the motor with greater efficiency. Motor run capacitors are designed for continuous duty. They are energized while the motor is in operation. You will often find motor run capacitors with a voltage rating of 370VAC or 440VAC with a capacitance of 1.5uF – 100uF. Typically, the construction material is polypropylene film.

Operational information
Electric motors that are single phase require a capacitor for a second-phase winding. If you use the wrong motor run capacitor, the rotor may hesitate due to an uneven magnetic field. The hesitation may result in performance issues such as a noisy or overheated motor, increased energy consumption and general decreased performance.

Faulty motor capacitors
You can sometimes spot a faulty motor run capacitor by it’s swollen appearance – or it may have blown and become leaky. Of course, these capacitors should be carefully replaced. In addition to an outright capacitor failure, the capacitance may become reduced over time. Capacitors that are operating with a decreased capacitance may create performance issues. Again, these capacitors should be carefully replaced.

British Airways is Googling passengers – comforting or creep?

In an effort to increase personalized service, British Airways has introduced the ‘Know Me’ program which give airlines staff members the authority and the tools to search online for passenger information.

Using iPads, staff members search through a list of that day’s passenger names for images on Google so that they can recognize them as they enter the airport or the plane. Their name is then used by the employees so that they are greeted and recognized personally. In addition to using the iPads to search for images, the staff can search for other information about the customer including their travel history and any past complaints.

British Airways maintains that their goal is to deal with customer complaints more effectively. As reported in the Telegraph, the British Airways program must comply with UK privacy laws. Assuming the program does comply with privacy laws, the question is do we think British Airways employees should be googling their passengers in an effort to provide better customer service? Is this comforting to think that they care to learn about us or just a tad creepy?

Take better pictures with your cellphone camera

Whether you have an iPhone, Android or any other phone with a camera, here are our top 3 tips for getting better pictures with every shot.

1 – Composition:
Even with an entry level camera phone, remember the basic rules of composition when taking cell phone pictures. The rules of thirds is important: don’t place the subject of your photo in the middle of the frame. Place your subject in about 1/3 of the way into the frame. Also, if you are photographing people, line up your shot so that their eyes are about 1/3 from the top of the frame.

Another tip for composing great photos is to declutter your background. Taking a picture of your new car? Be sure your garbage can is put away. Compose your backgrounds to tell a story. A day at the beach can be told in pictures with the sun, sand and surf behind your subject. If you can, change your perspective – always shooting from a standing position will never get you the best angle for the best possible picture.

2- Blurry pictures:
The most common problem with digital pictures is that the camera is not held steady which often produces a blurry pic. Brace your arm on a table or against a wall. If there is no table or wall in site, tighten your arms against your body and hold your breath as you take the photo. Release your breath as you take the photo.

3 – Lighting:
Poor lighting can produce blurry pictures, poor color and shadows. Whether you have a flash or not on your camera phone, be sure to compose your pictures to get the best light possible. Stay away from bright sunlight – that will create pictures with harsh shadows. Instead, compose your pictures in the shade. While this will result in a darker photo, you will have a more even tone without the harsh shadows caused by direct sunlight.

If you are indoors, try to keep curtains open and the lights on – but keep your subject from being right under bright lights. It is better if the light is all around the room rather than right over your subject.

With these tips and some practice, you will be able to take great photos on your camera phone.

How to wipe a hard drive clean

If you are donating, disposing of or selling anything that contains a hard drive, chances are that drive should be wiped clean before it leaves your hands. Even if the hard drive has failed, special equipment can read a hard drive which could expose your private and confidential information to the next owner.

So what should you do before your dispose of your equipment with a hard drive? There are several methods that are recommended by the experts. Here is an explanation of two of them:

1 – Destruction:
According to the National Institute of Standards and Technology Special Publication 800-88, “Destruction of media is the ultimate form of sanitization.” Some methods to destroy a hard drive include pulverization, incineration, melting, and shredding however it should be noted that it is recommended that you never burn a hard drive, put a hard drive in a microwave, or pour acid on it in an effort to destroy it. Those methods should be avoided. What IS recommended is that you drive a nail through the hard drive, being sure to pierce the hard drive platter. This can be accomplished with a hammer and nails or even a drill. If you use this method to destroy the hard drive, drive several nails through or drill through it several times. Another method is to remove the hard drive platter and sand it to erase the data.

Destroying the hard drive ensures that you or anyone else will never be able to use the hard drive again. Should you want someone to be able to use the hard drive again, you might consider another option which is data destruction software.


2 – Data Destruction Software:

Sometimes called hard drive eraser software or disk wipe software, data destruction software is a way to remove your personal data off of a drive without permanently destroying the drive. While not a fool proof method (user error comes into play here), it is the easiest way to wipe a drive clean. Data destruction software overwrites a hard drive in a particular way to make extracting data from it very difficult, if not impossible. Most computer users should be able to safely wipe their hard drive clean using this type of software.

There are other methods available however they are generally expensive. Either of the two methods outlined above should suffice for the average computer user that would just like to wipe a drive clean before disposing of it.

How about a solar energy bikini for this summer?

We thought we’d seen just about everything powered by solar panels or solar film until we came across this bikini. Made by Solarcoterie, this bathing suit is made of photovoltaic film strips sewn together in series with conductive thread! With a USB connection, you could be laying on the beach and powering your iPod at the same time. The suit is constructed of 1″ x 4″ solar strips which terminate in a 5V regulator and a female USB connector – perfect for powering your iPod.

The downside is that the bathing suit is a currently custom made offering only so this is not something readily available at your local store. And, we don’t have the power specs but wonder if this also wouldn’t be a great solution for charging other small appliances needed at the beach – like most smartphones and iPads. Of course, this got us thinking about our dream ideas of powering a small cooler (imagine never needing ice at the beach!) or a small fan for cooling off while you’re baking in the sun. The biggest item on our wishlist is always a blender but we’ve got that covered with our battery operated one!

No matter what, we think this use of solar technology is genius.

Solder Sucker for Desoldering – New product alert!

Solder Sucker

Solder Sucker

We’re always adding new electronic components, parts and supplies to our inventory. This week, one of our new products is a solder sucker, which is a ‘must have’ for anyone that works with electronics and solder.

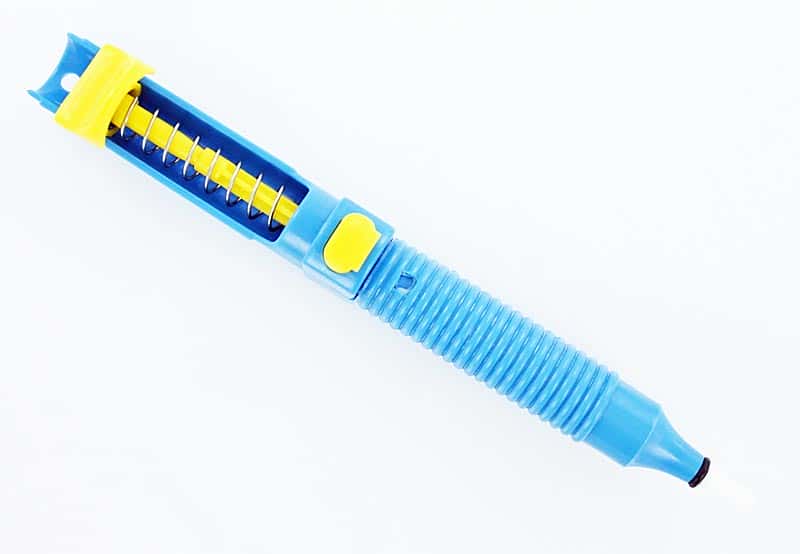
Crafted in Germany by Amax, this solder sucker is a pump style solder remover. Use it on heated solder to remove the solder from your boards and components. It comes in the original manufacturer’s packaging with instructions for the use and care of your solder sucker.

Here are some basic desoldering instructions:
1. Heat your soldering iron. Push down on the plunger until it clicks to arm the soldering iron.
2. Clean your soldering tip. Place the soldering tip on the side of the old joint. Apply some fresh solder on the old joint to help the old solder soften.
3. Set the plunger on the solder sucker. Place the tip of the solder sucker on the old joint as close as possible to the soldering tip.
4. Release the plunger by pressing the button.
5. Repeat until much of the old solder is gone.
6. If any of the old solder is left in PCB holes, you can heat the old joint again and using the soldering tip on one side and a miniature flat screwdriver on the other, gently rock the joint back and forth lightly to loosen up the tiny leads on the components.
7. You may need to repeat this process again when there is a stubborn joint.
9. Remove your component carefully; taking care to not damage the board.

Wire Bending Radius Guide

At West Florida Components, we get asked very often about wire bending radius. It is important to have guidelines when working with wire or cable in your projects, particularly projects that involve curves, ductwork and buildings. There are a few rules of thumb that come into play when you think about the bending radius of wire and cable. Following these rules will ensure that your wire and cable projects go off without a hitch!

Here is a chart to use: https://www.westfloridacomponents.com/wire-bending-radius.html

Microchips to be imbedded in pills?

Yes, it’s true. Proteus Biomedical has announced that they will be launching a innovative product that imbeds microchips in pills so that patients can be monitored by their health care professionals and even their families.

The purpose of the monitoring is to be sure that patients are taking their medications properly and on time and to also monitor a range of additional patient information including respiration rate, heart rate, temperature, sleep patterns and physical activity. It is estimated that up to 50% of all patients take their medication improperly so this will assist health care professionals and family member with the patient’s drug regimen.

The sensors are about the size of a grain of sand. The sensor-enabled tablets are called Helius. The Helius can be taken with pills or incorporated into medications by the drug manufacturers. Once ingested, the sensors are activated by stomach acid. Each sensor contains a very small amount of copper and magnesium which react with stomach acid to create the power necessary to generate a digital signal. Through an adhesive patch on the skin, the digital signal is read and and the data transmitted through the patient’s cell phone.

Don’t look for the microchipped pill just yet. Proteus Biomedical will be introducing their new product in the UK first.

What are breadboards?

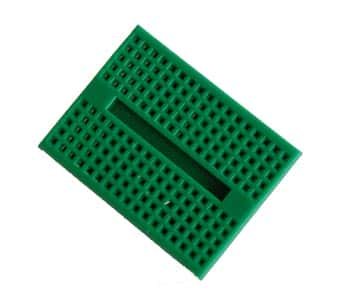
Plastic BreadboardBreadboards are a simple solution for circuit building, especially when you need to prototype or test a circuit. Constructed of plastic, a solderless breadboard contains hundreds of spring-loaded connection sockets (also called tie points) which connect the leads for through-hole electronic components and 22 AWG wire to form an electronic circuit. One key feature of breadboards is that they require no solder to connect your components making testing or prototyping a circuit very quick and painless.

How do breadboards work?

A breadboard is constructed on hundreds of holes arranged in vertical and horizontal rows. The outer rows which run lengthwise across the circuit board are generally reserved for the circuit’s power supply. The interior rows of holes are where the electronic components are inserted. Each row of holes forms a node; that is, any components that reside on the same node will be connected when they are inserted into a hole in that same row, or node. This is because under each row is a copper plate that connects the holes to each other.

The future of medical monitoring: Temporary tattoos in place of electrodes and wires

If you’ve ever had an EEG, you’ll remember all the preparation that was required to get you hooked up properly to the monitoring device. There was sticky gel and tape and those pesky electrodes. According to the journal “Science”, researchers have developed a patch which bends, wrinkles and stretches like skin. The patch would be applied to the body like a temporary tattoo and would contain the electronic components necessary for sensing, communications and relaying information from the body to a monitoring device.

In addition to the ease of applying these patches, another major benefit is that any testing could be conducted in a more natural and less stressful environment since results could be transmitted wirelessly to the monitoring equipment.

Not only could the patches contain the electronic components for medical monitoring, they could also be used with patients that have muscular or neurological disorders, such as ALS. The patch could facilitate communication with computers. In addition, the researchers have shown that when placed on the throat, the patch can detect muscle movement.

The patch is constructed in the shape of tiny wires called filamentary serpentine. This configuration allows them to be bent, twisted, scrunched and stretched while maintaining functionality and contact with the skin.